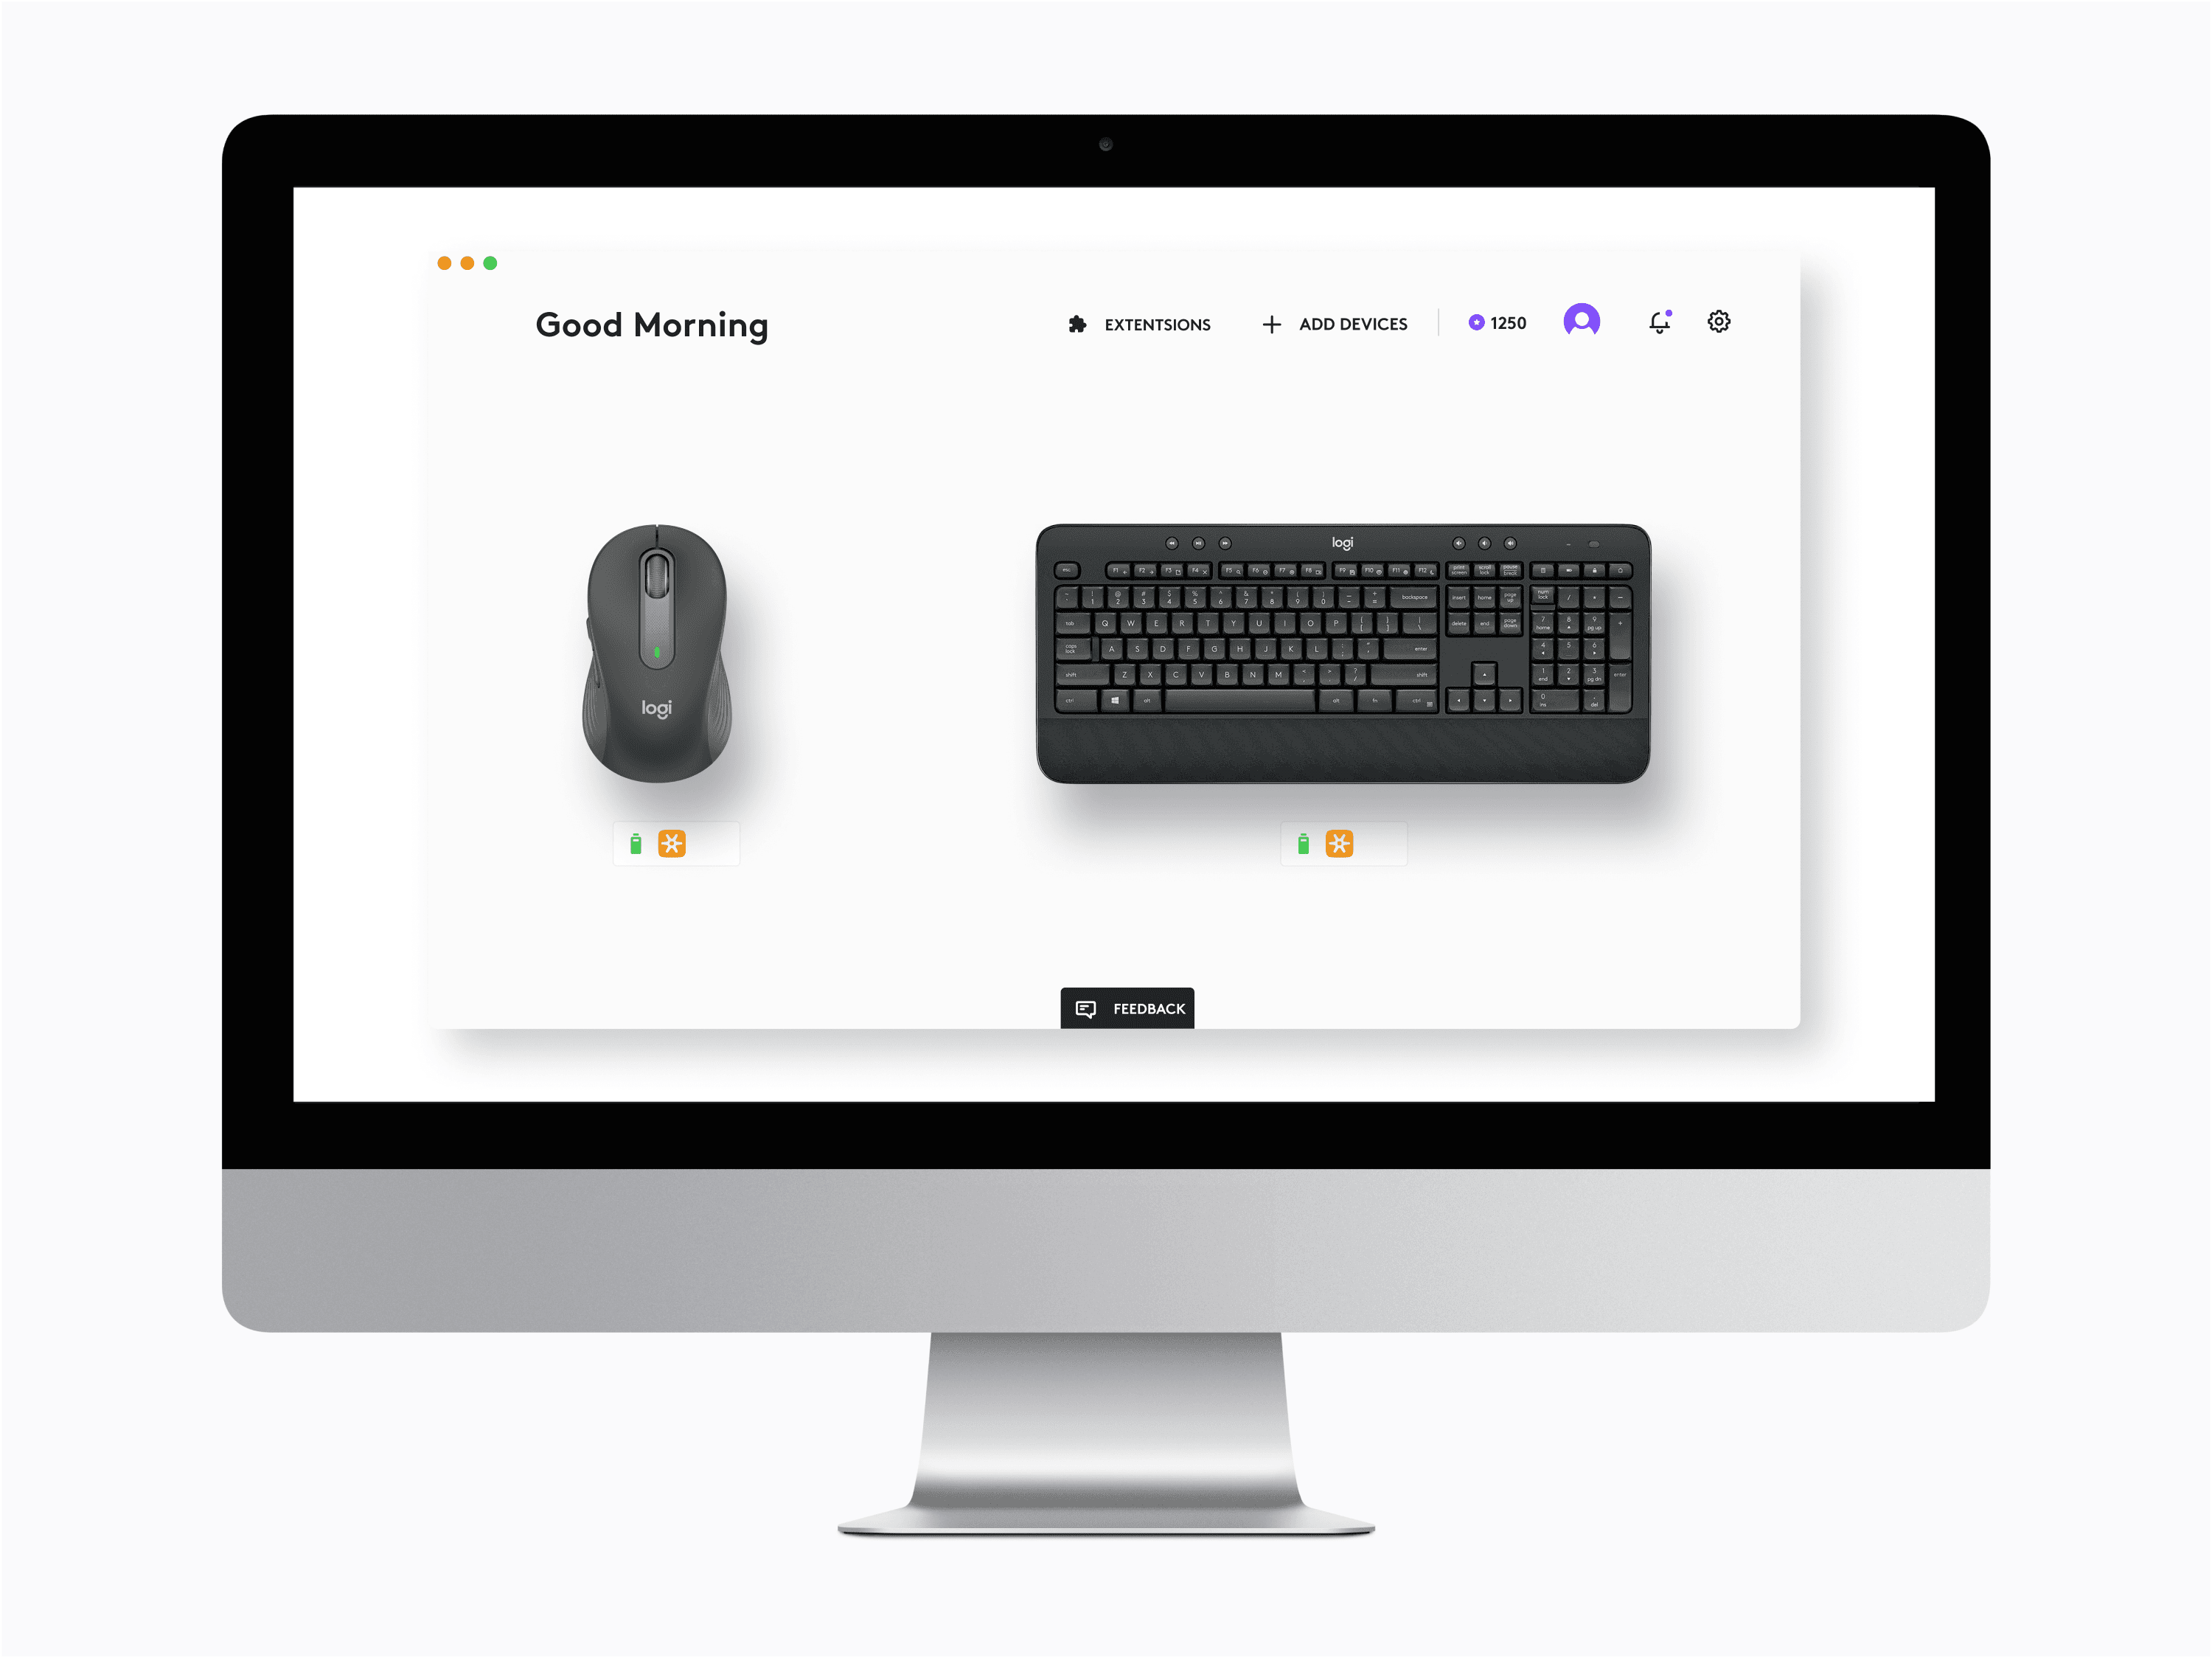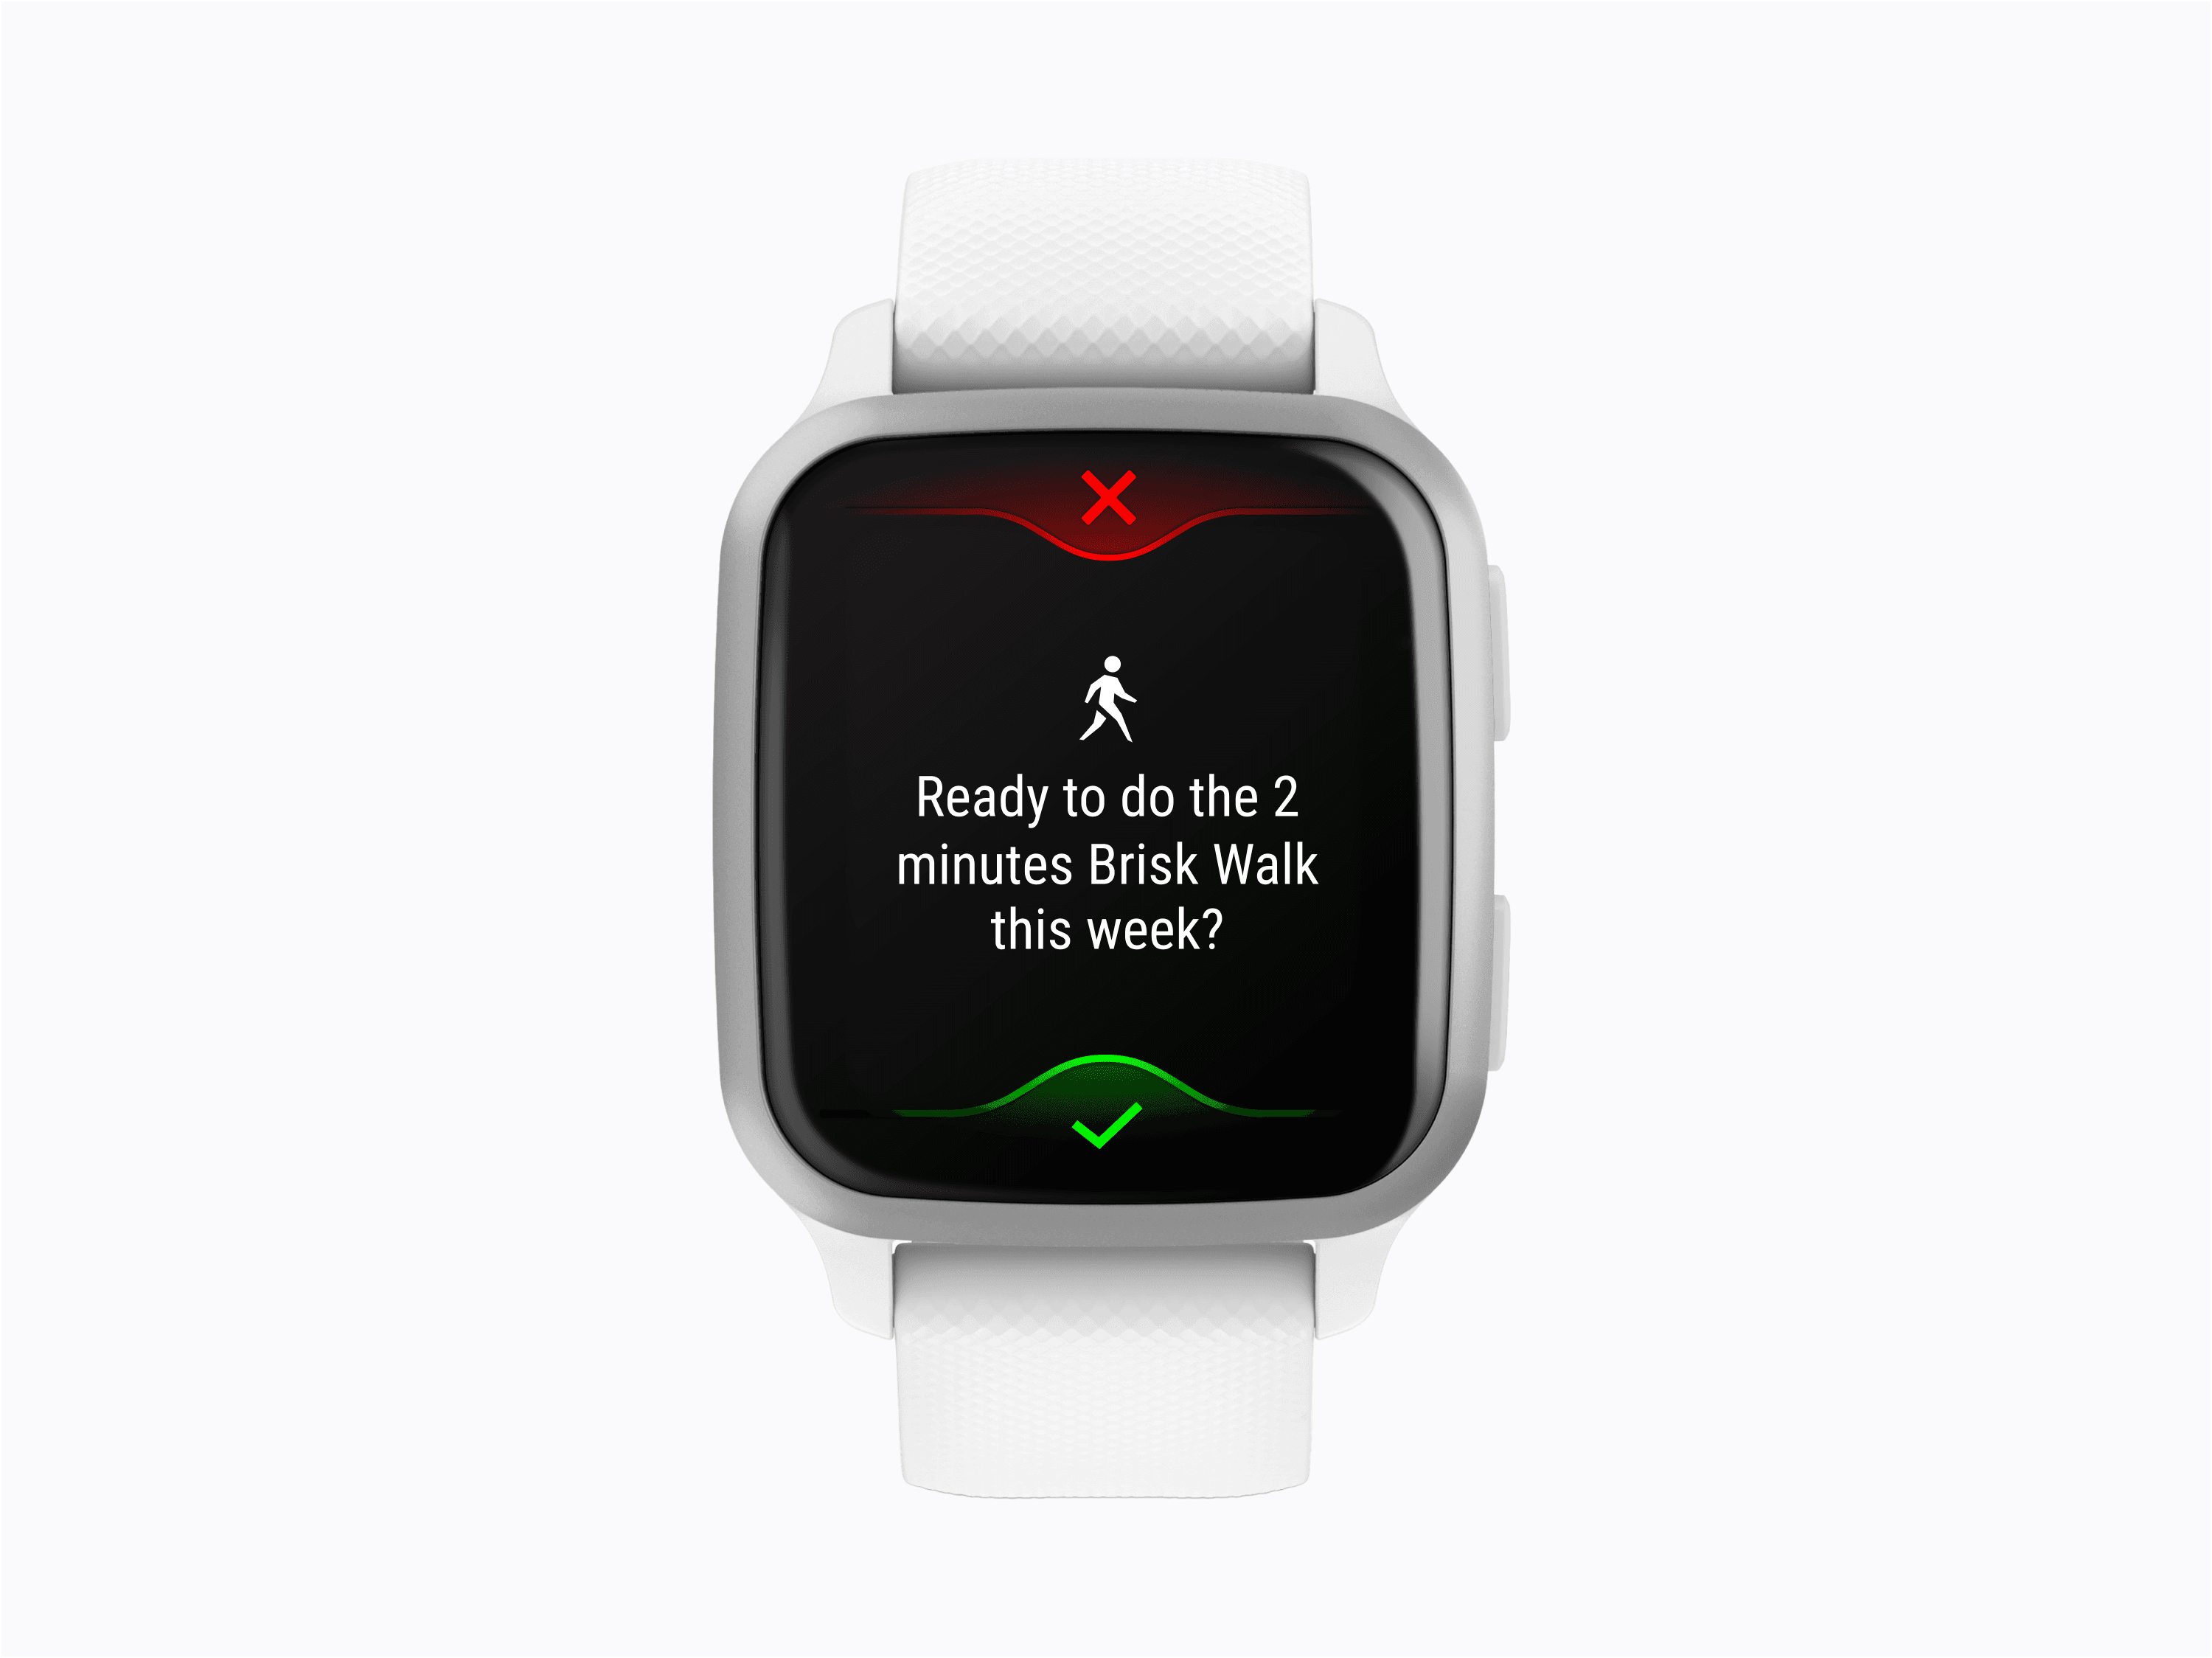
UI/UX Design Project Lead (Me - Jeter Weng)
Design Manager (May - Design Review)
2 Software Engineer (Ben & Joyce)
2 Project Managers (Bo-Chun & Chung-Kai)
1 Telehealth Business Specialist
1 QA Engineer
Desktop App
Telehealth Cart
Figma
(3 months) June - September 2021
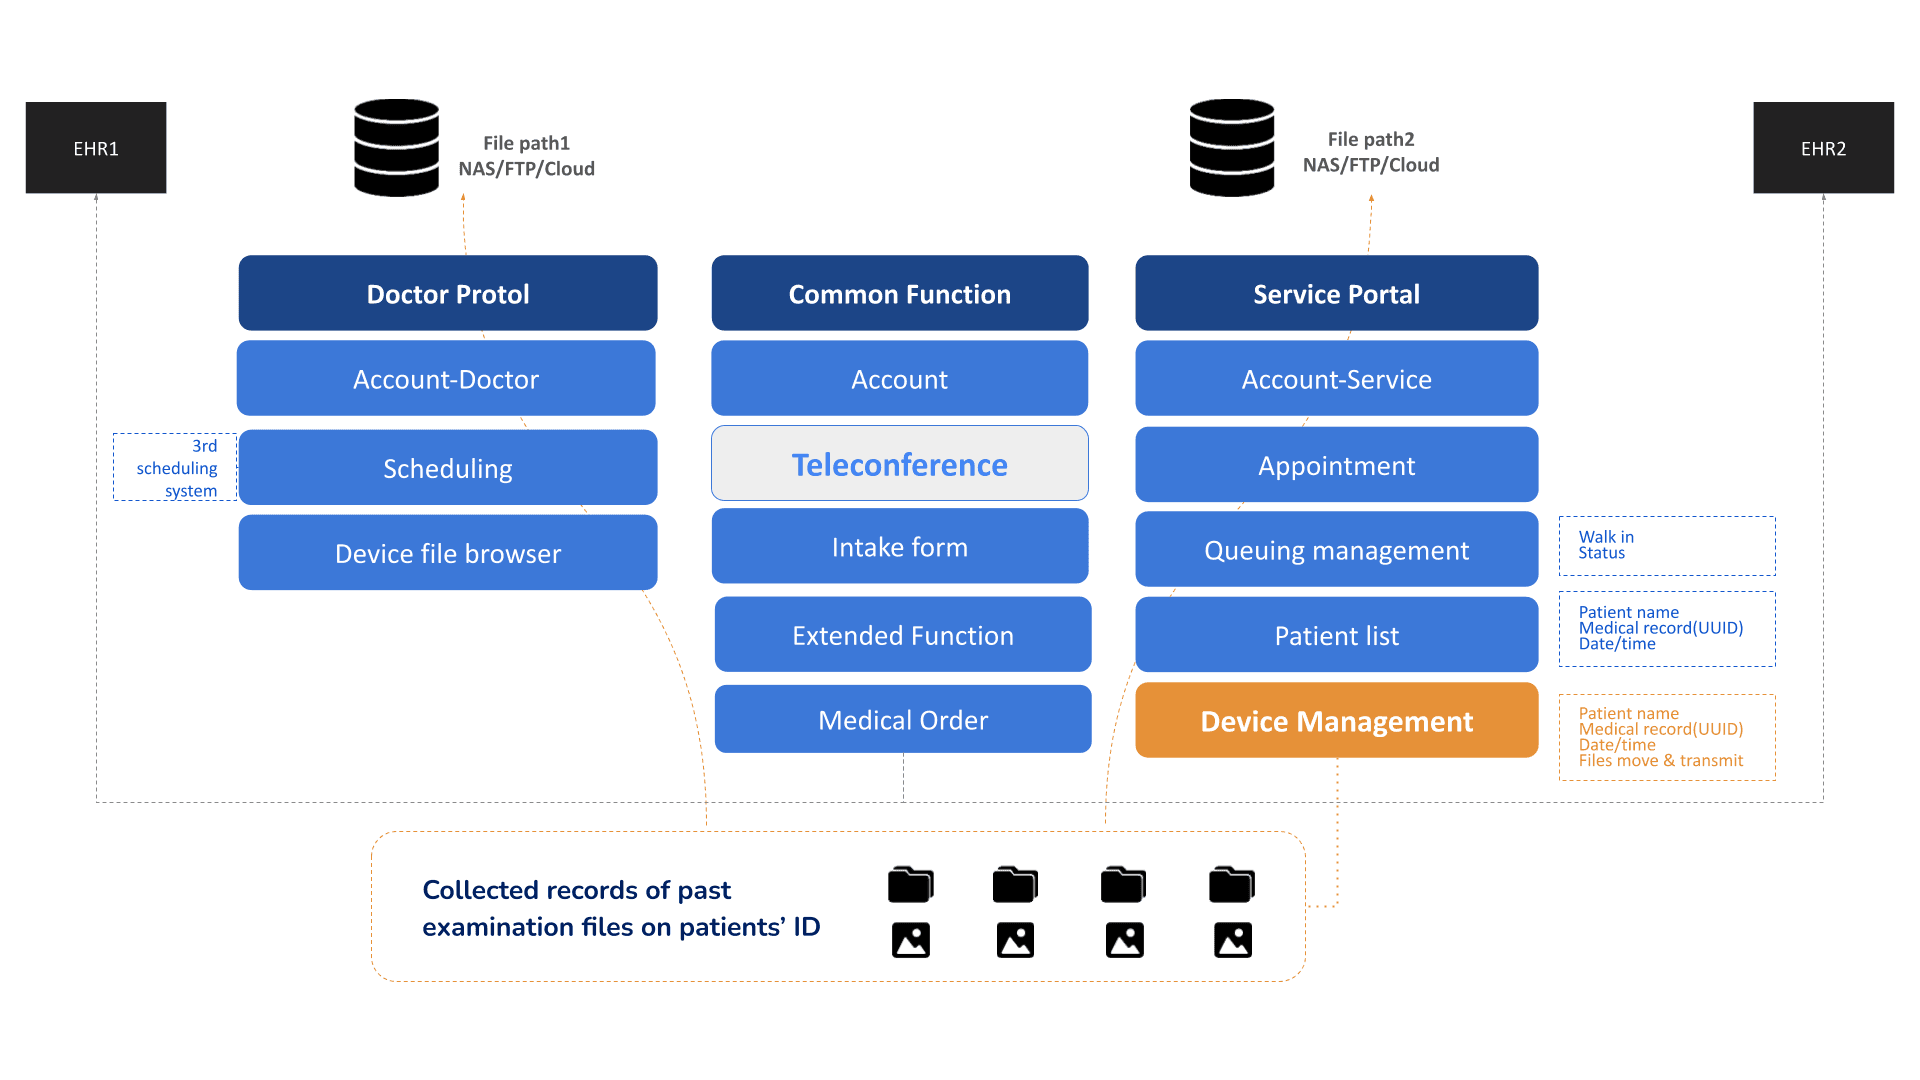
The Device Management software enhances telehealth data management by offering compatibility with various operating systems and Advantech Telehealth Carts, streamlining health examinations and symptom identification. Medical staff connect and verify devices, input patient details, and use selected devices for examinations, facilitating efficient data collection. Collected data, including .pdf files, images, and audio, are categorized by patient ID and synced to the cloud, enabling seamless integration into hospital systems for effective record management and retrieval.

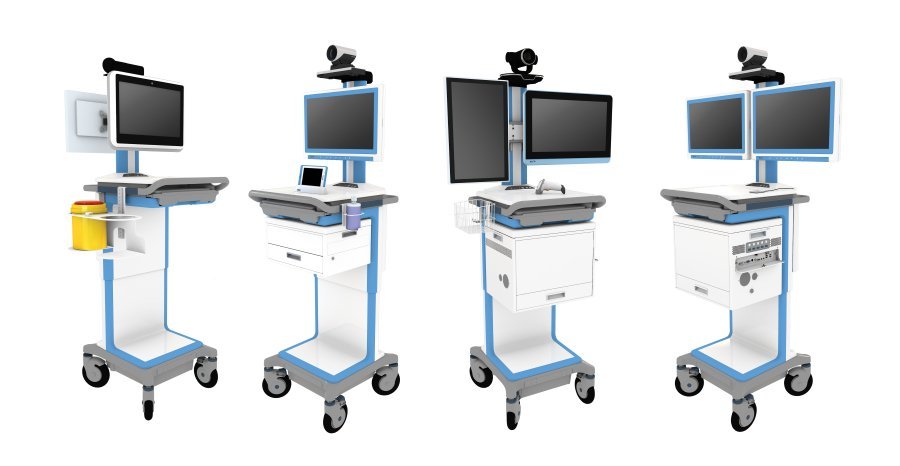
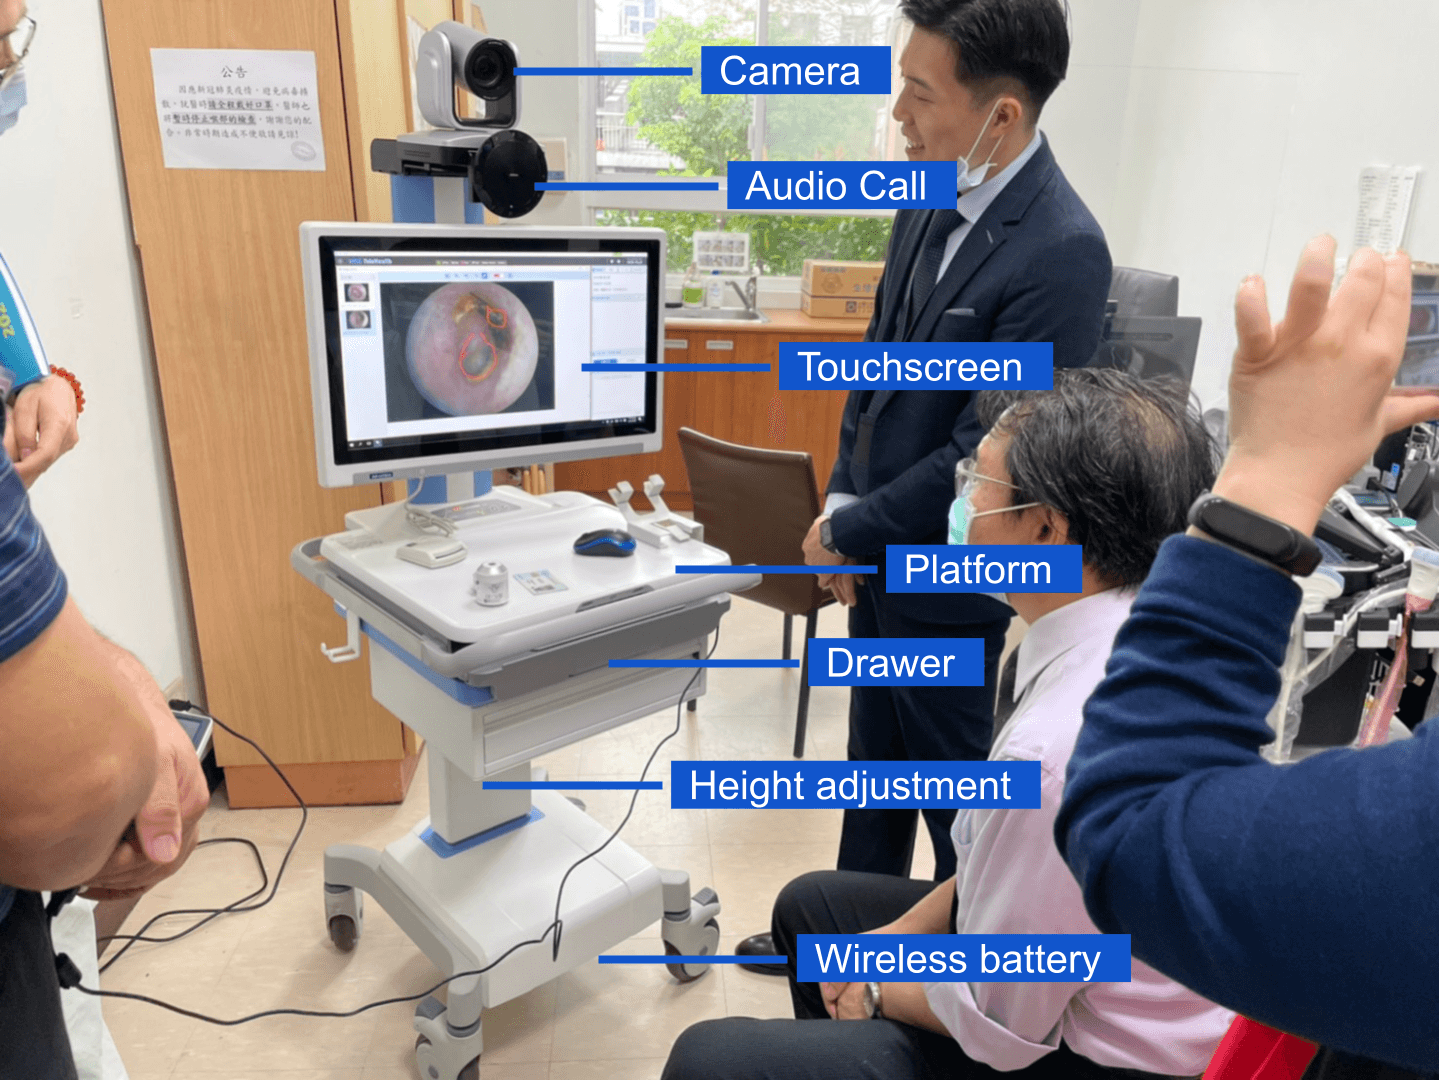
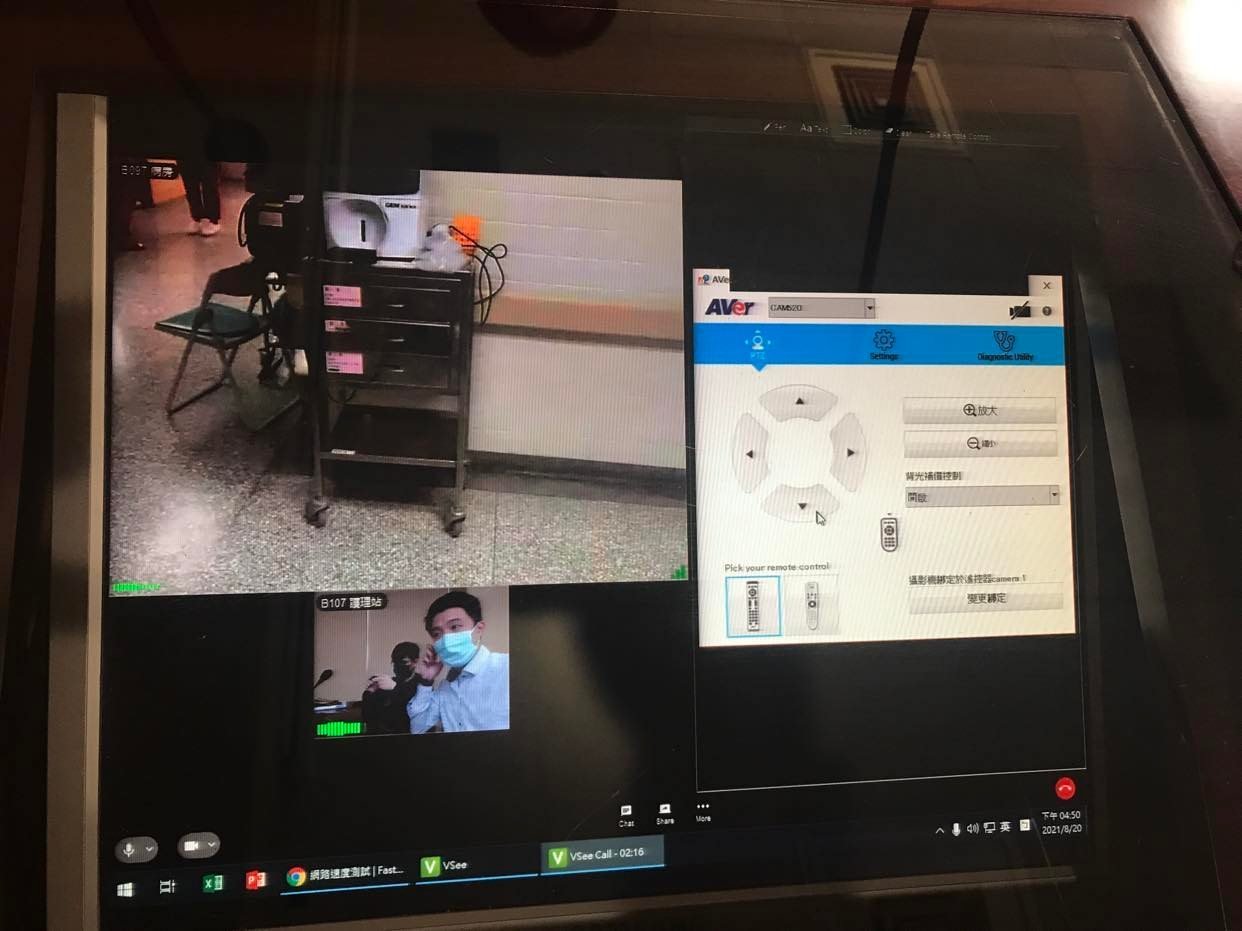
Advantech has developed telemedicine hardware devices such as AMis22 and AMis72 to seamlessly integrate software and hardware. The company aims to enhance the efficiency of remote collaboration by focusing on medical staff and integrating iTelemed software with Telehealth’s backend systems, appointment platforms, consultation software, and file management tools. Telehealth carts, and mobile medical devices, play a key role in delivering remote healthcare services through telecommunications and information technology. They are commonly used for:
Conducting remote consultations with healthcare providers for diagnosis, treatment recommendations, and medical exams.
Monitoring patients with chronic conditions and transmitting real-time data, such as vital signs or blood glucose levels, to healthcare providers.
Connecting patients with specialists who may not be available in their local area.
Providing mental health and behavioral health services, such as therapy or counseling, to patients in remote locations.
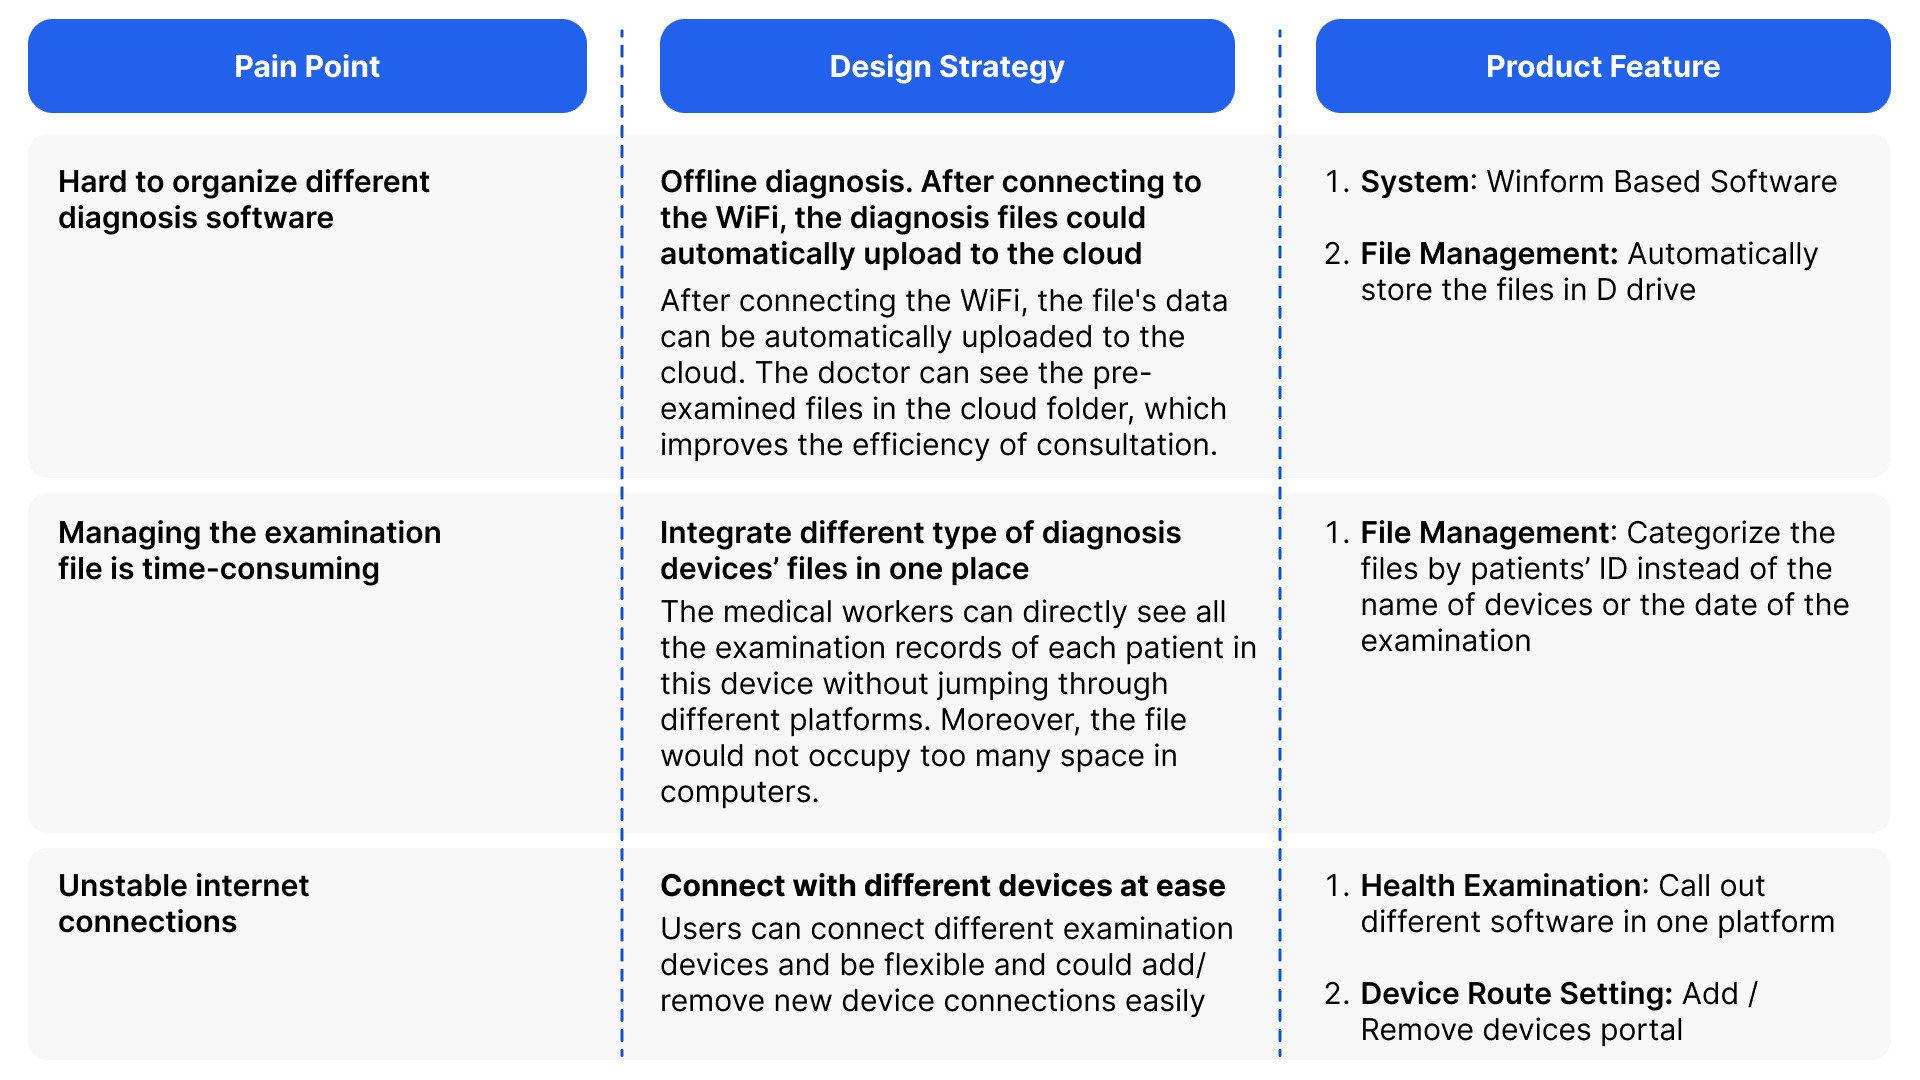
I summarized the three most imminent pain points based on the user studies…
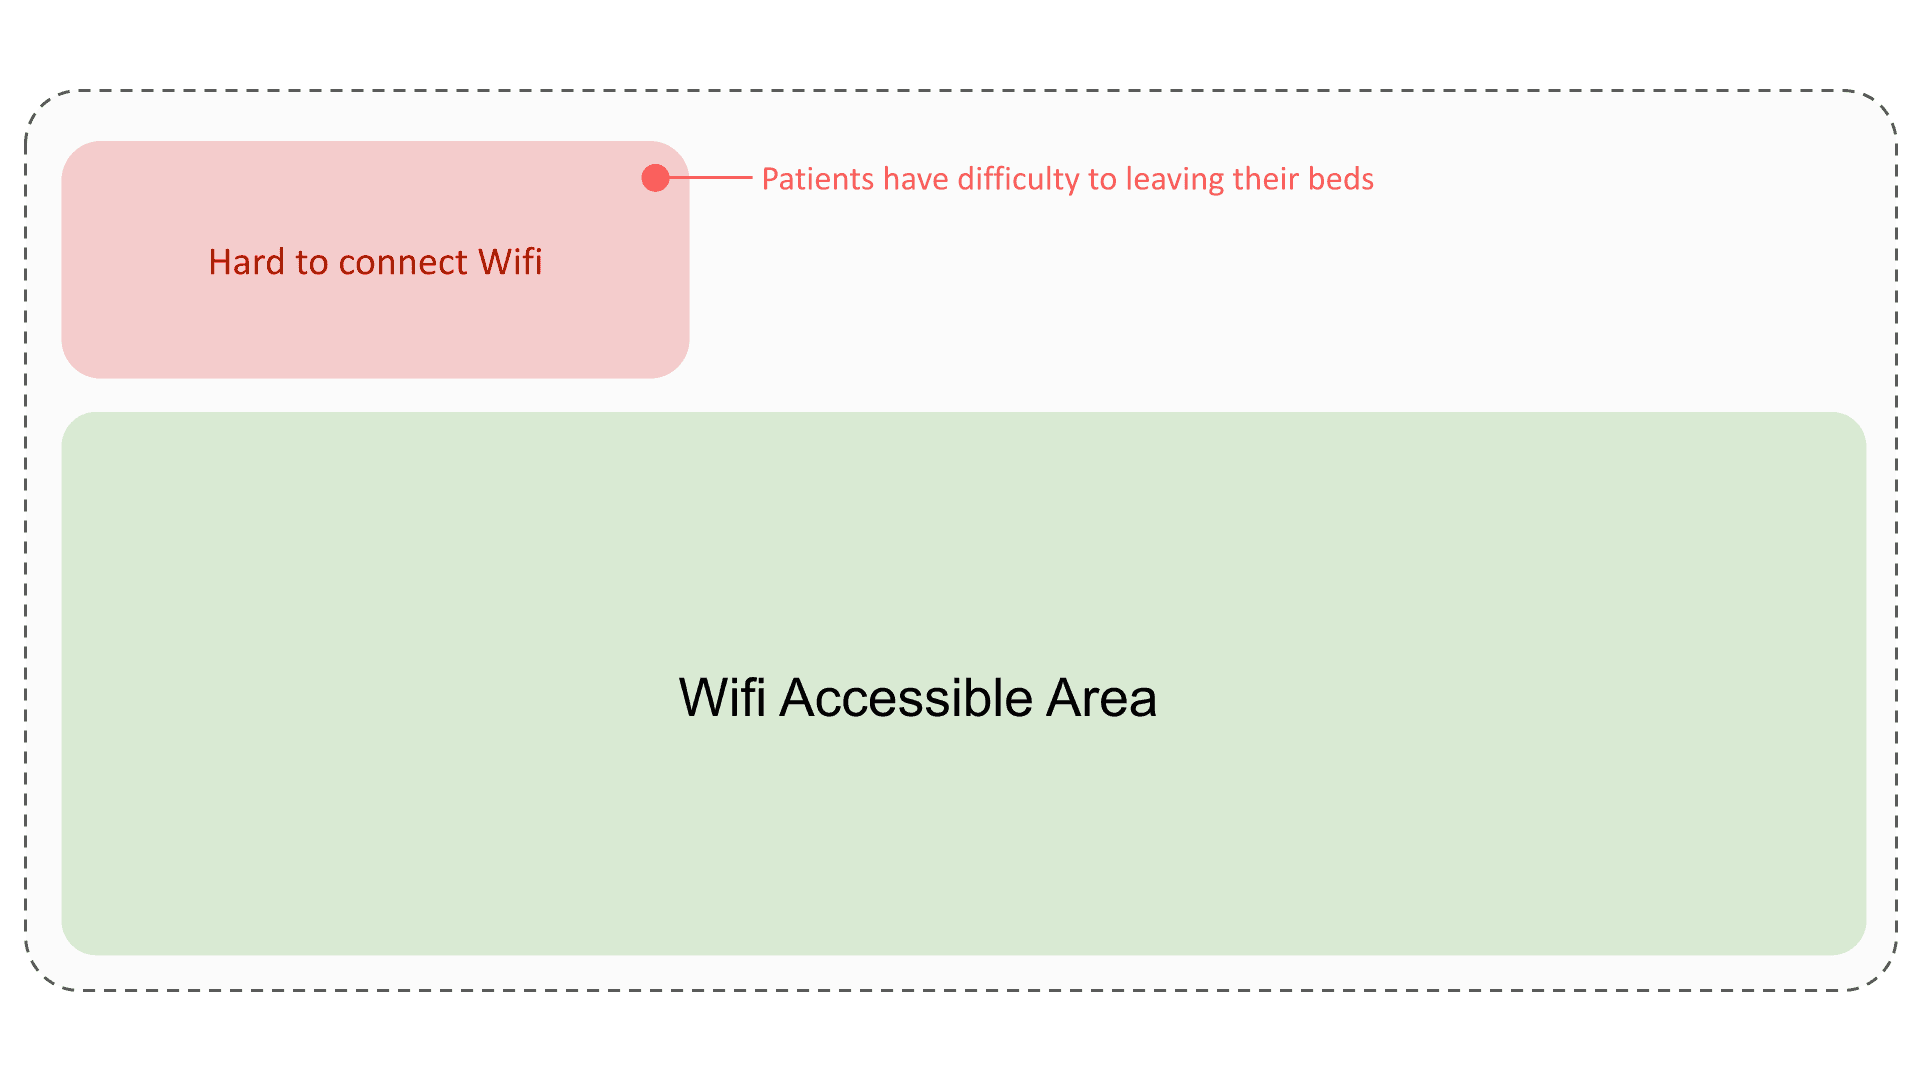
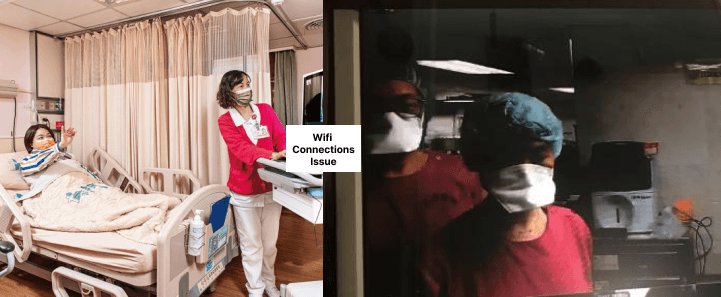
Pain Point 03: Unstable internet connections
Some patients in the care centers, confined to their beds, reside in areas with poor internet access.
Medical Staff: "Located in remote areas, our care centers suffer from extremely unstable internet connections. Beds in certain corners lack connectivity, and many elderly patients face challenges in getting out of bed or seeking assistance."
Step 01: Build up system framework
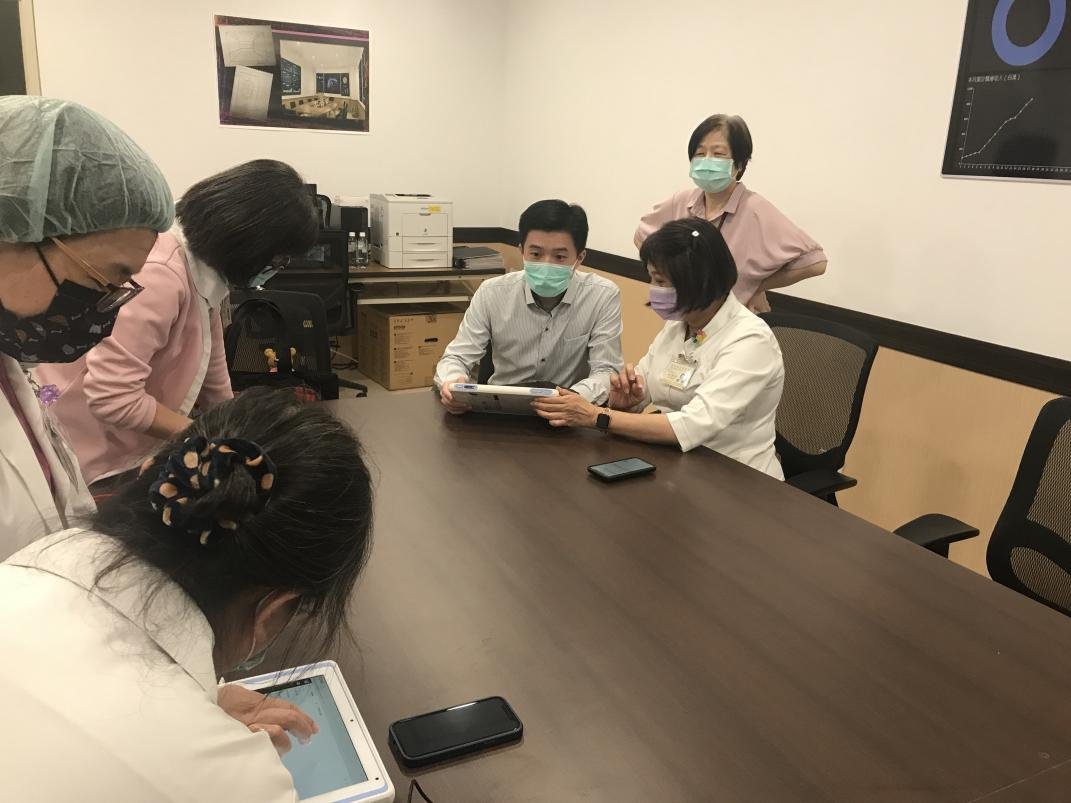
To swiftly confirm feasibility, the product manager, designer, and R&D team held meetings to draft a system framework that addresses challenges identified in user studies, aiming to create a more holistic experience for medical staff and patients.
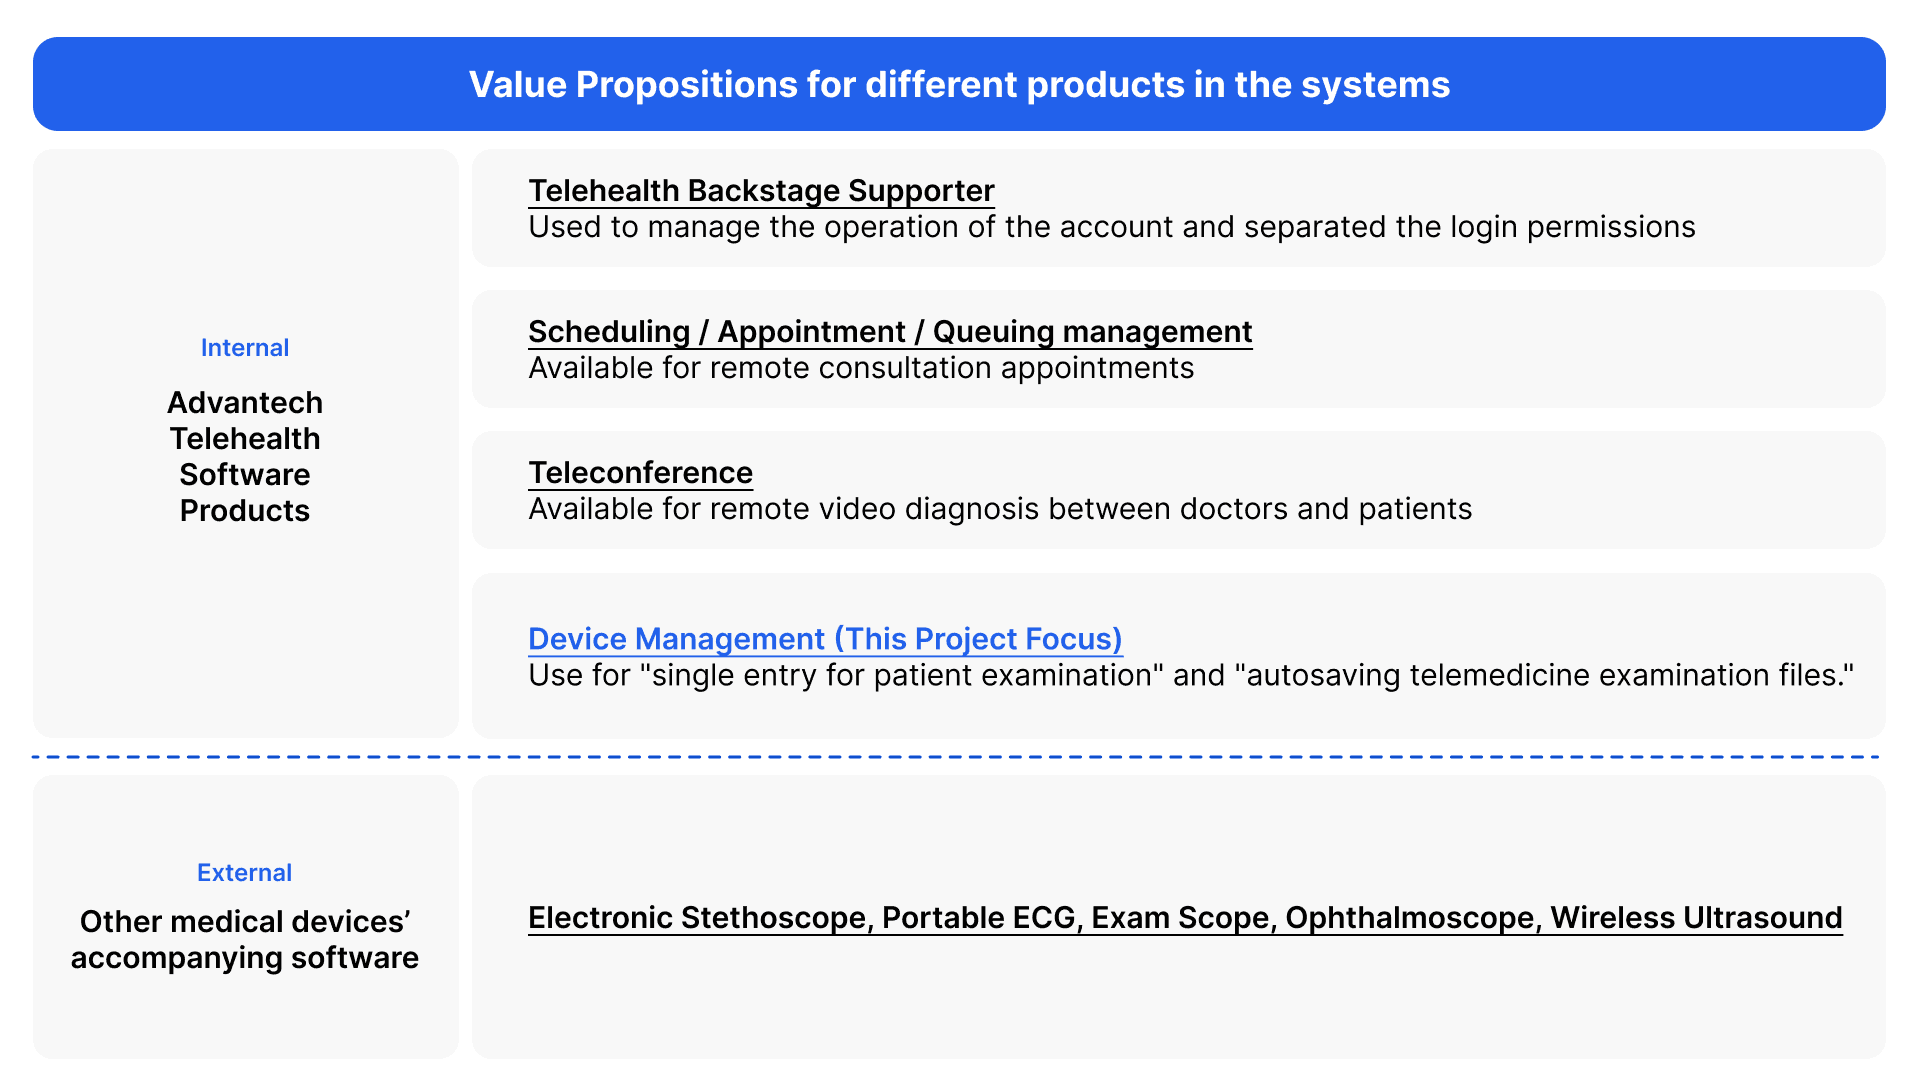
Step 02: Define each software value proposition & narrow down the design scale in this project
We defined the value proposition of each software within the system framework, enabling seamless integration with various hardware experiences. In this project, interns concentrated on developing the Device Management component, which was slated for completion within one month.
Step 03: Align Design Strategy with Software Development
Before brainstorming for the software’s features, I aligned all the pain points with the design strategies. In this way, we can ensure that the new feature proposals can deal with the users’ frustrations.
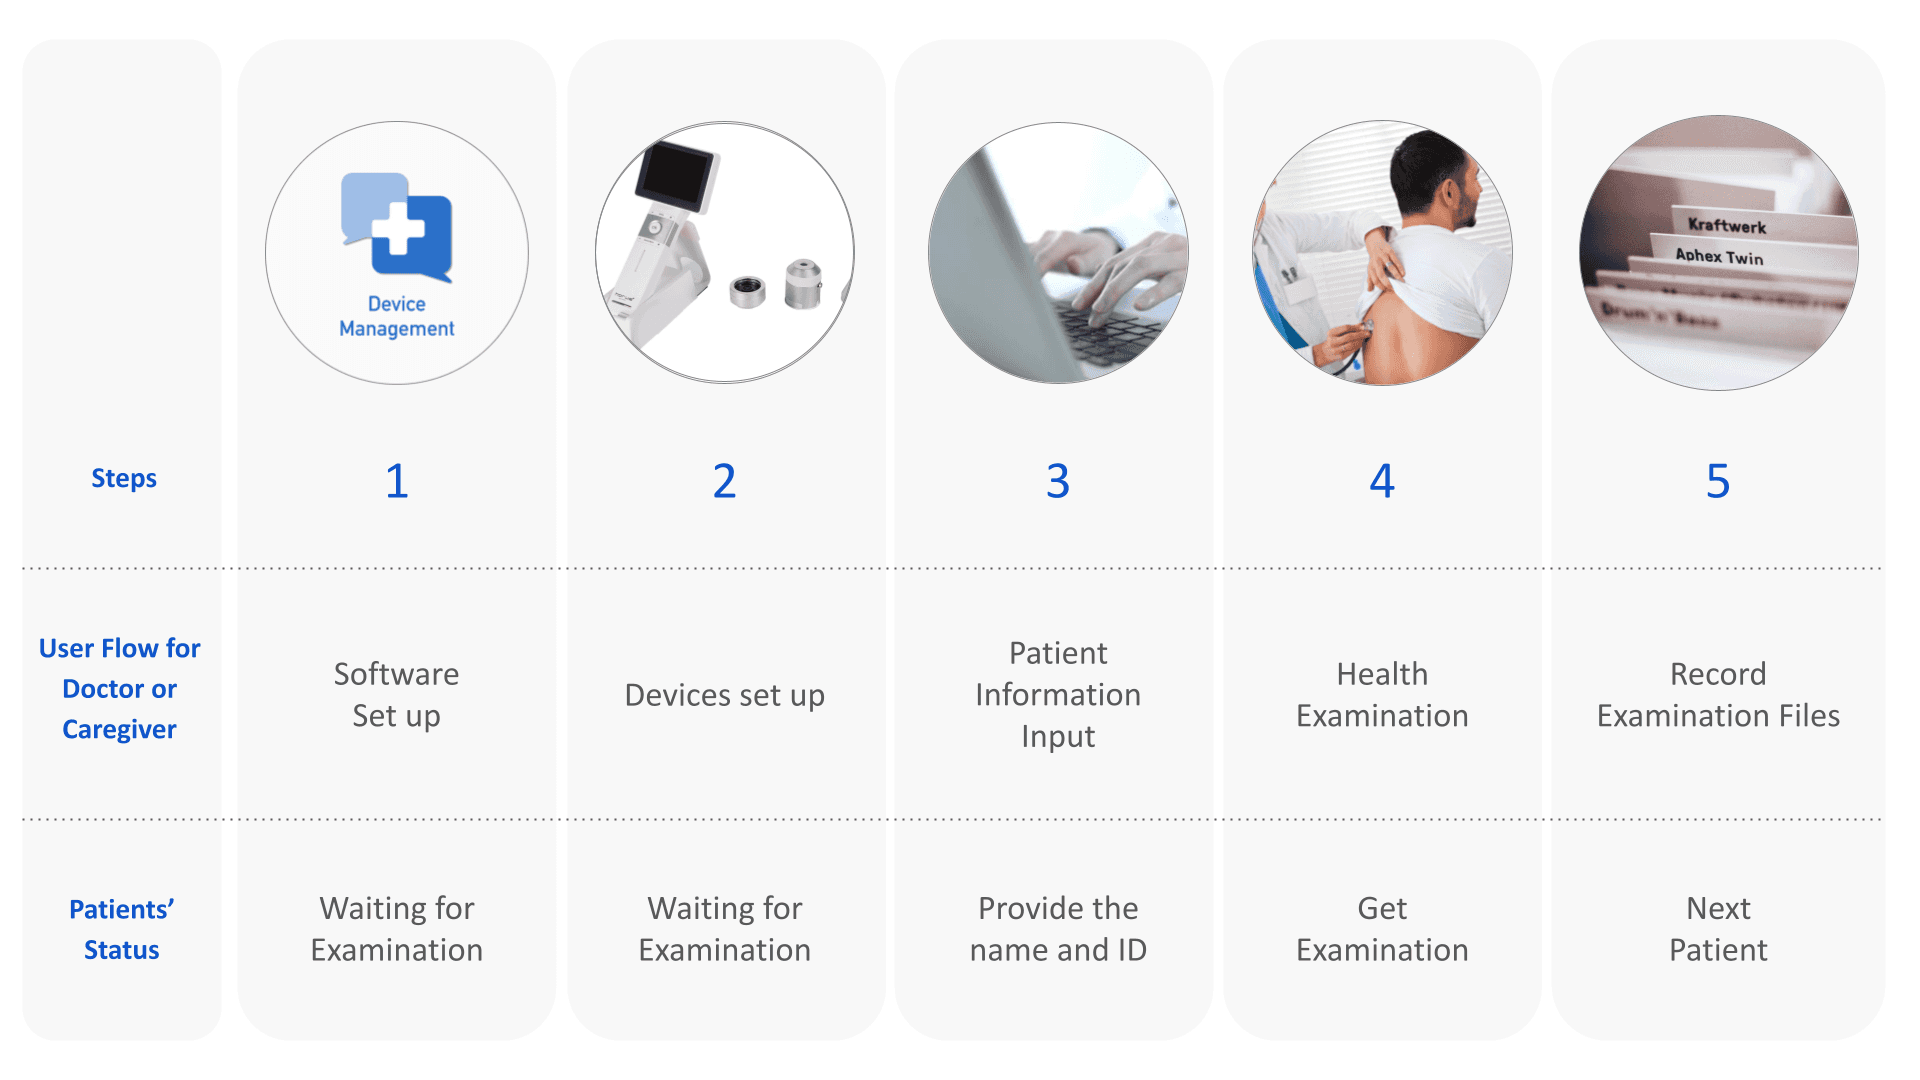
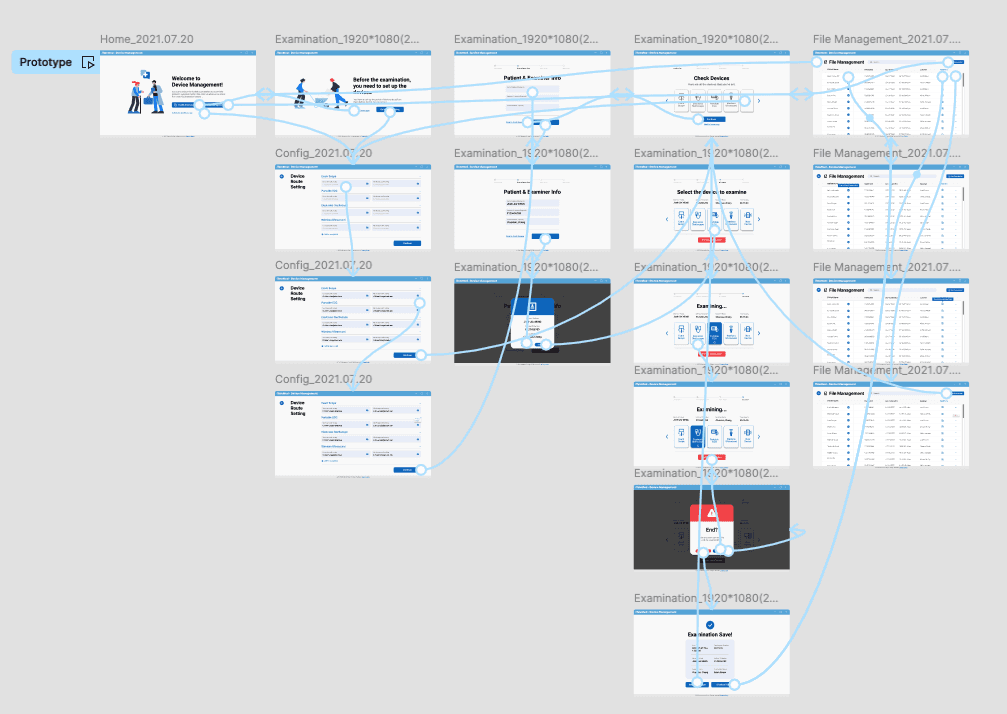
Step 04: Develop device management software’s user flow
The software is mainly designed for medical work. We consulted the doctor for a formal and basic examination process and transferred the process into five main steps in the device management software.
Step 05: Wireframing, Prototyping, and Testing
The software is mainly designed for medical work. We consulted the doctor for a formal and basic examination process and transferred the process into five main steps in the device management software.
Step 06: Design Iteration & UI Design Delivery
I created a clear and detailed guide for developing the software, laid out in a structured table format. This table is a vital resource for the engineering team, helping them understand exactly how the software should work, streamlining the development process, and ensuring the final product works just as planned. It also serves as a helpful reference for any future updates or problem-solving, making their job easier and more efficient.
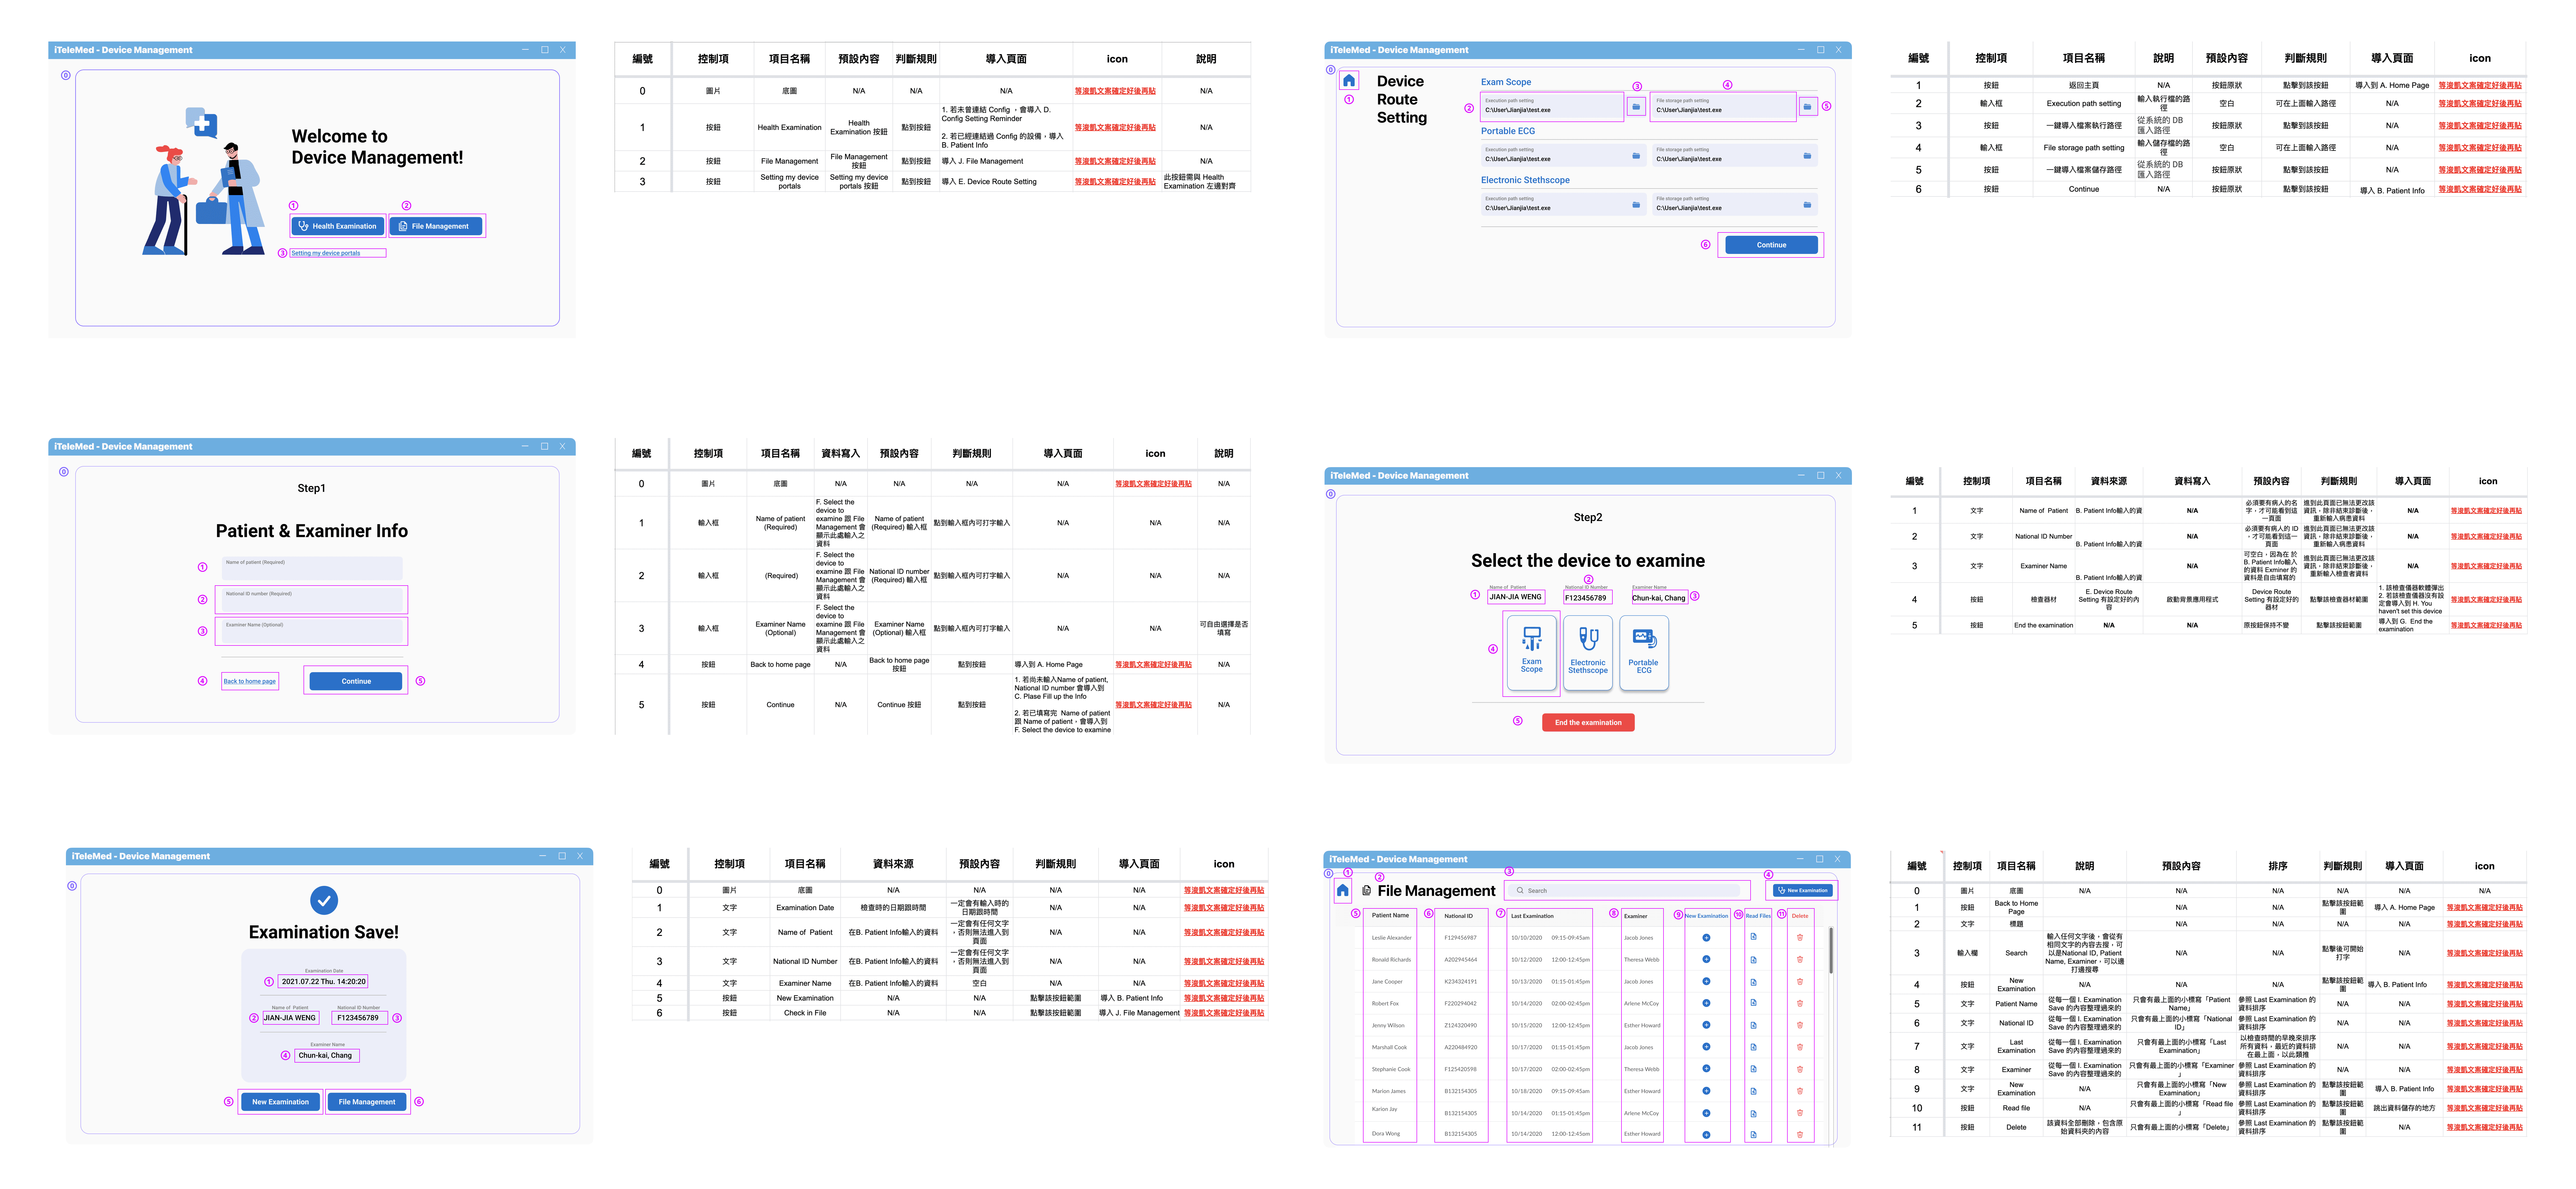
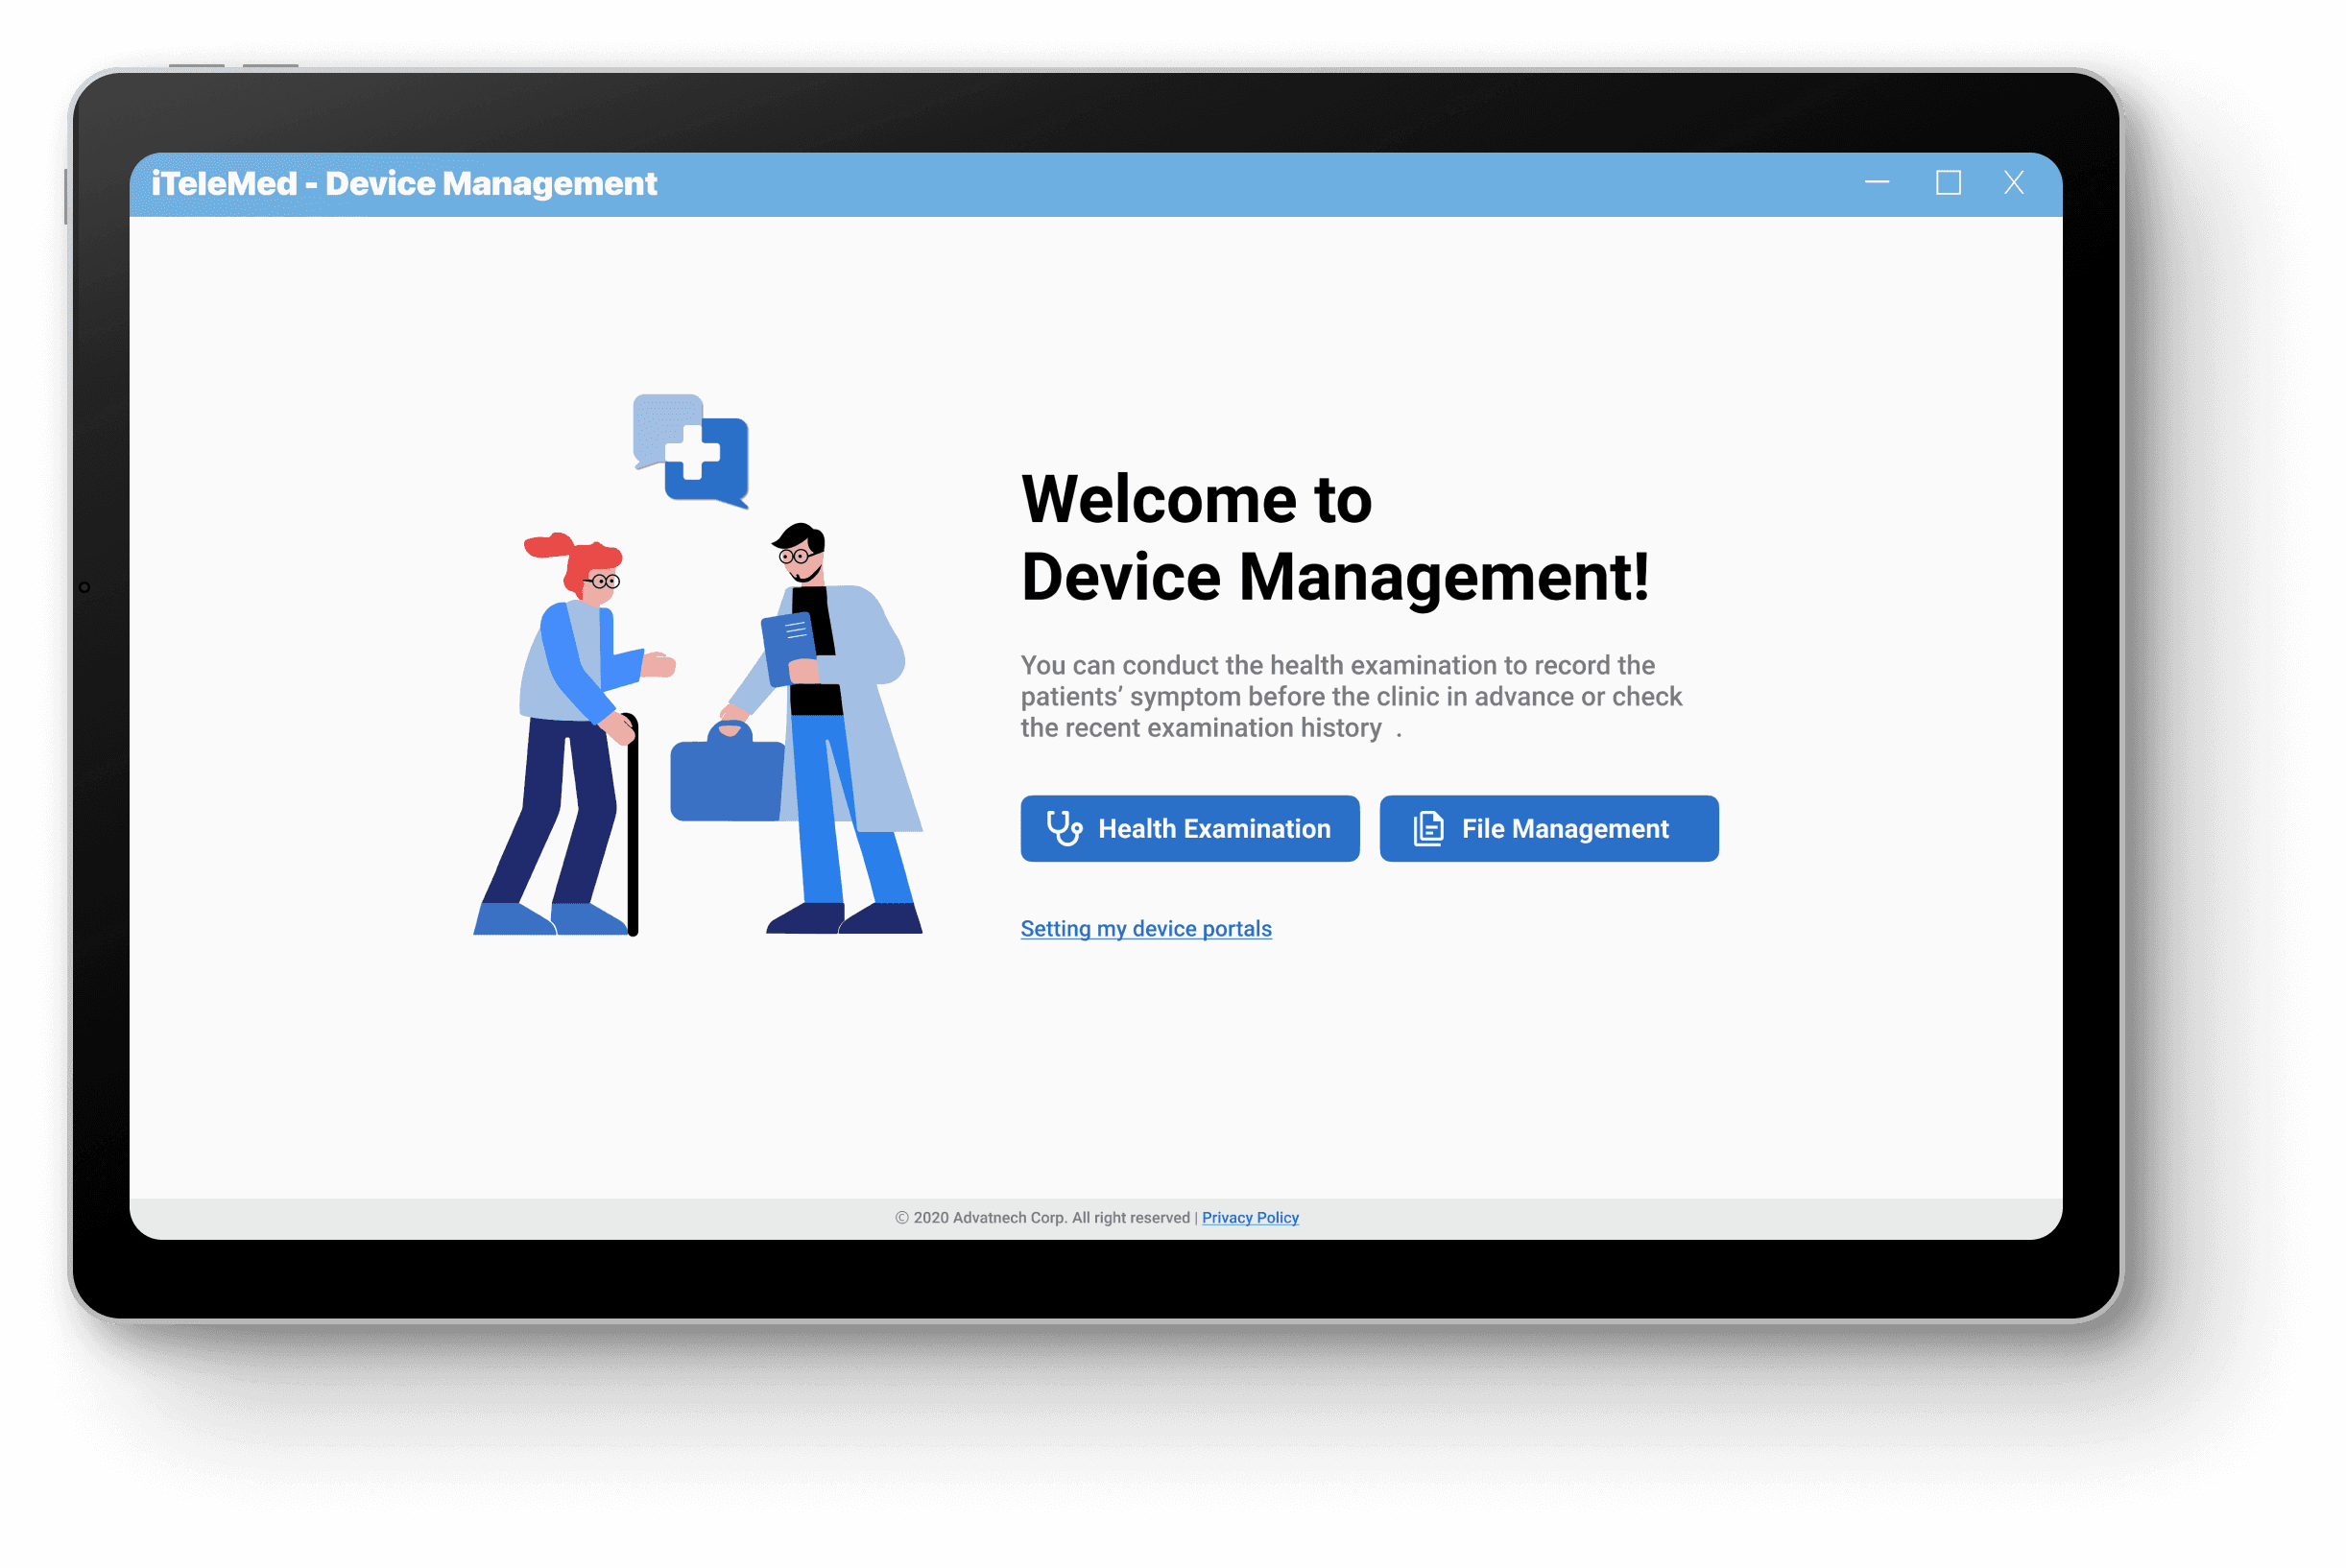
Step 01: Landing Page (Homepage)
The medical staff can conduct the health examination and record patient details right away before the clinic opens, or they can check recent examination history in advance.
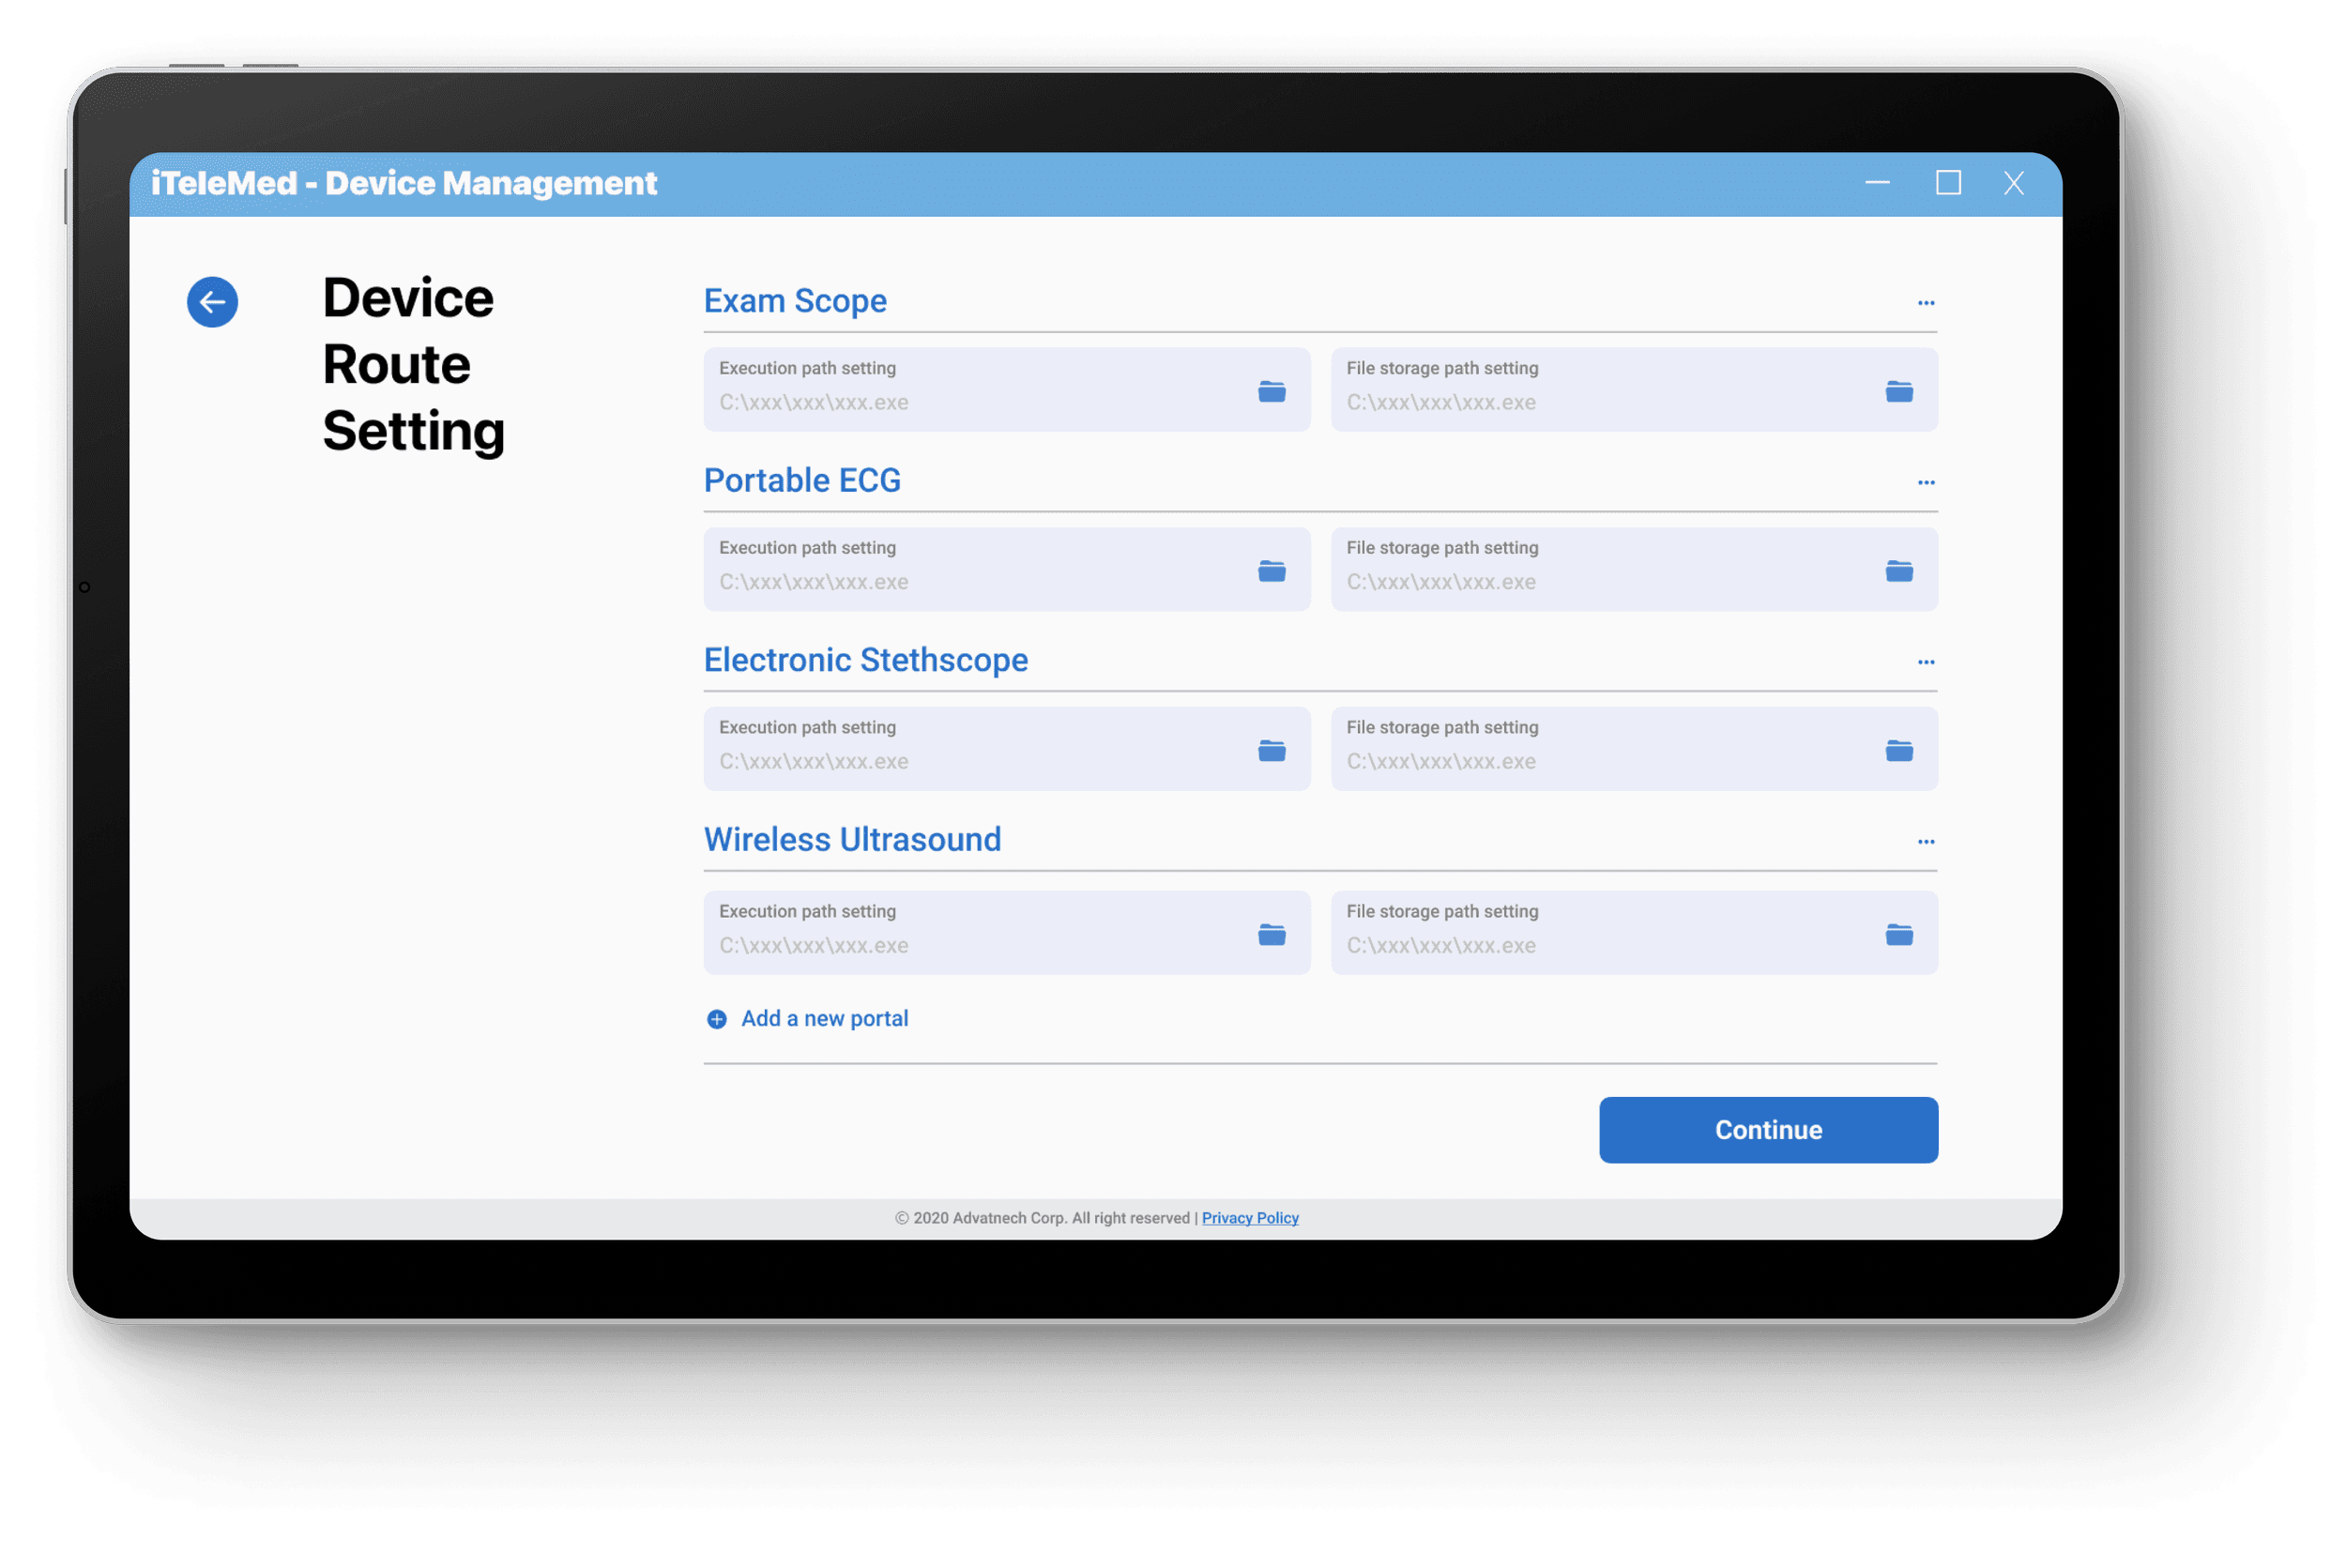
Step 02: Device Rout Setting
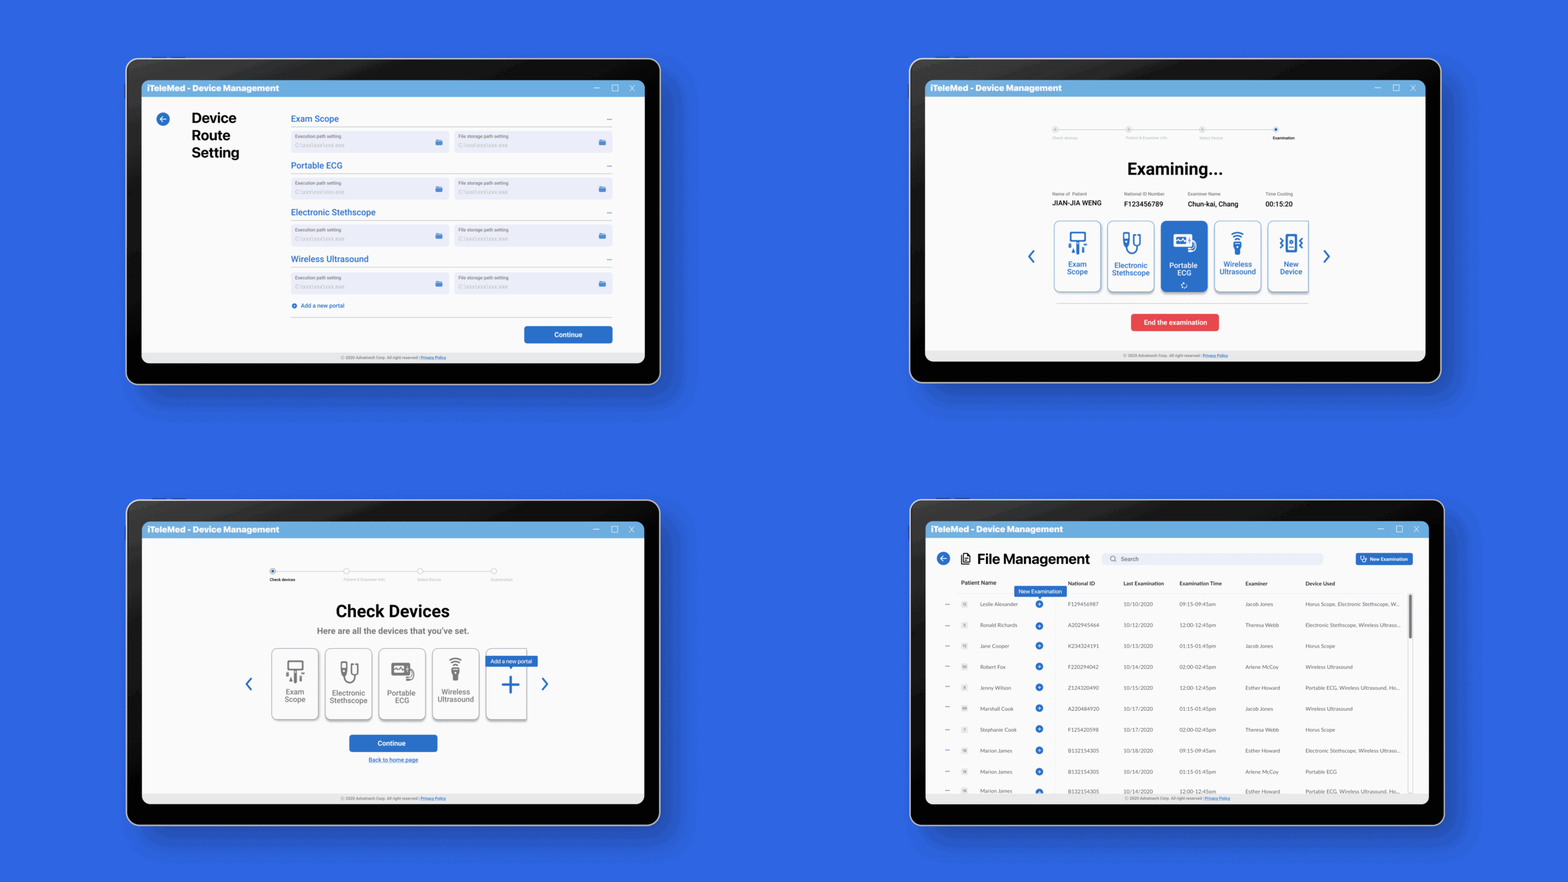
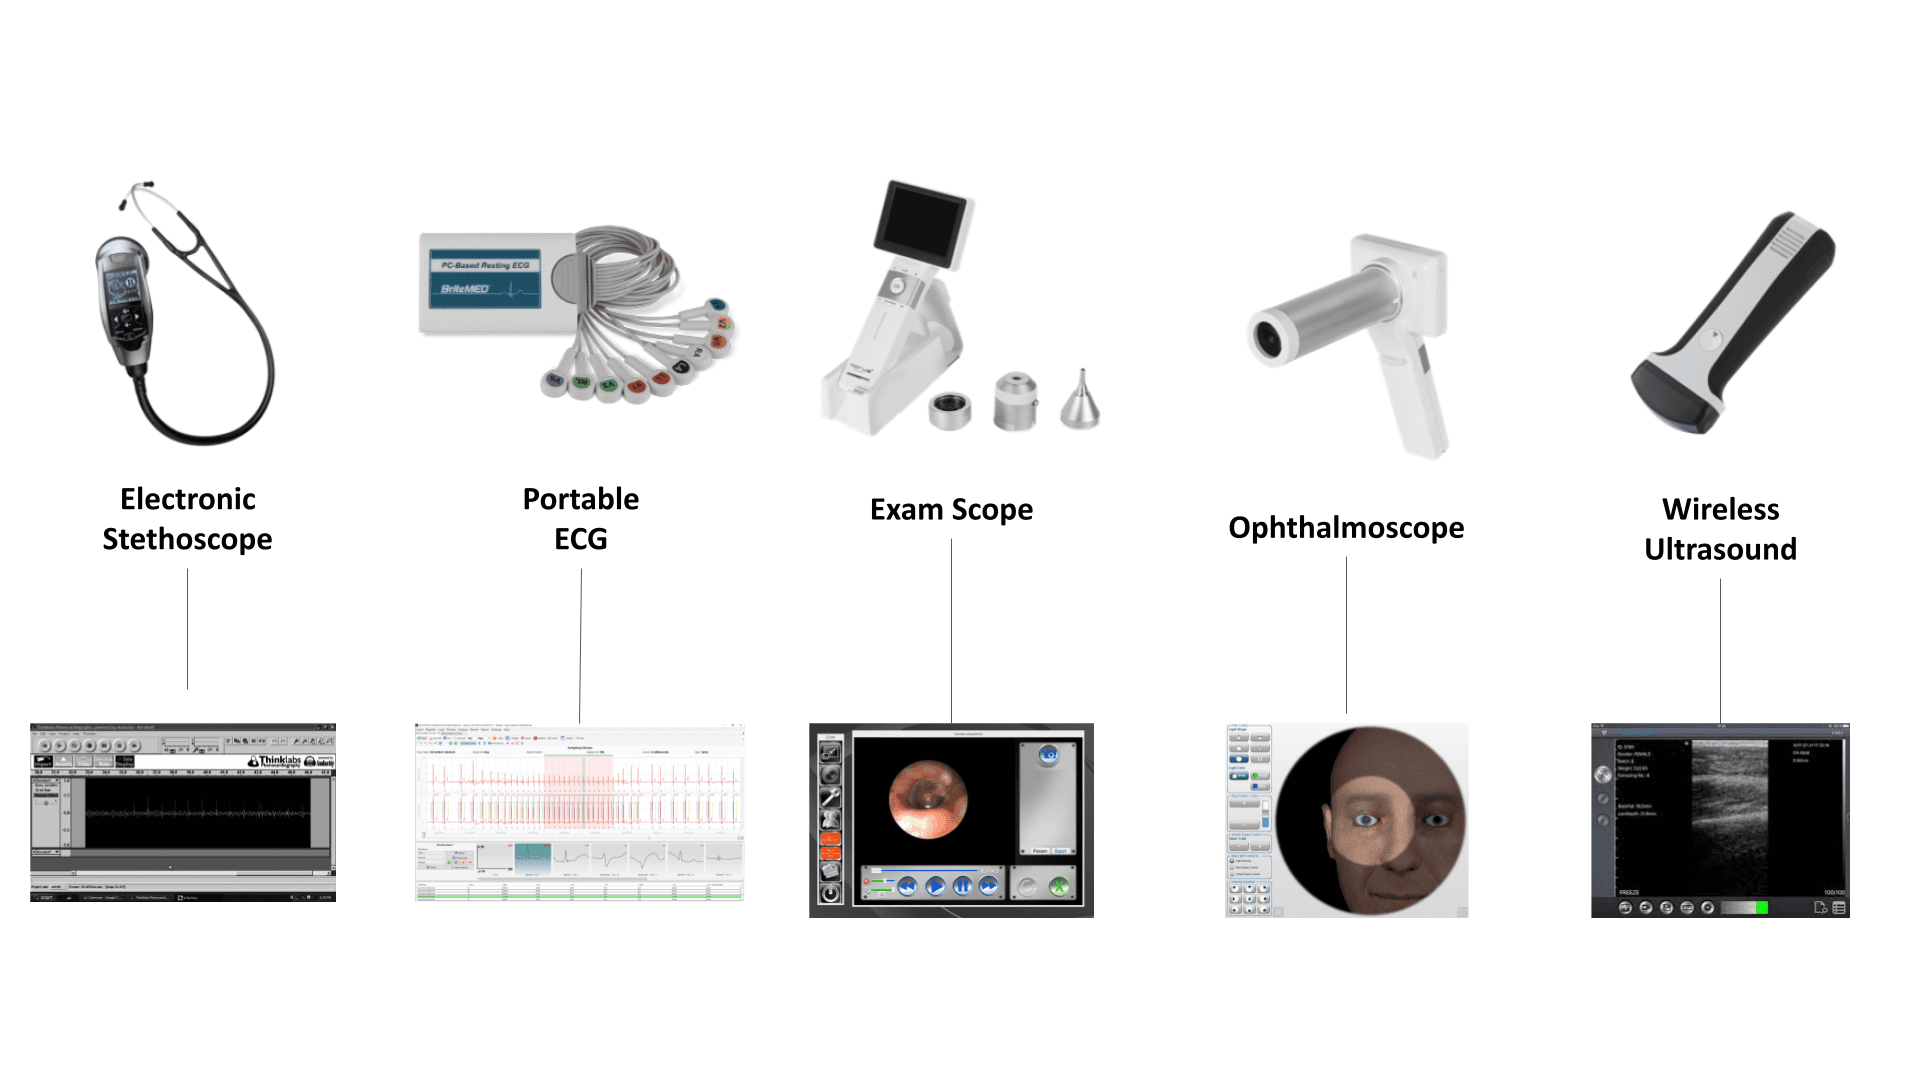
The medical staff starts by connecting the exam devices. Currently, it has exam scope, ECG, and stethoscope by default. Users can also add or delete devices as necessary.
Step 03: Verify Connected Devices
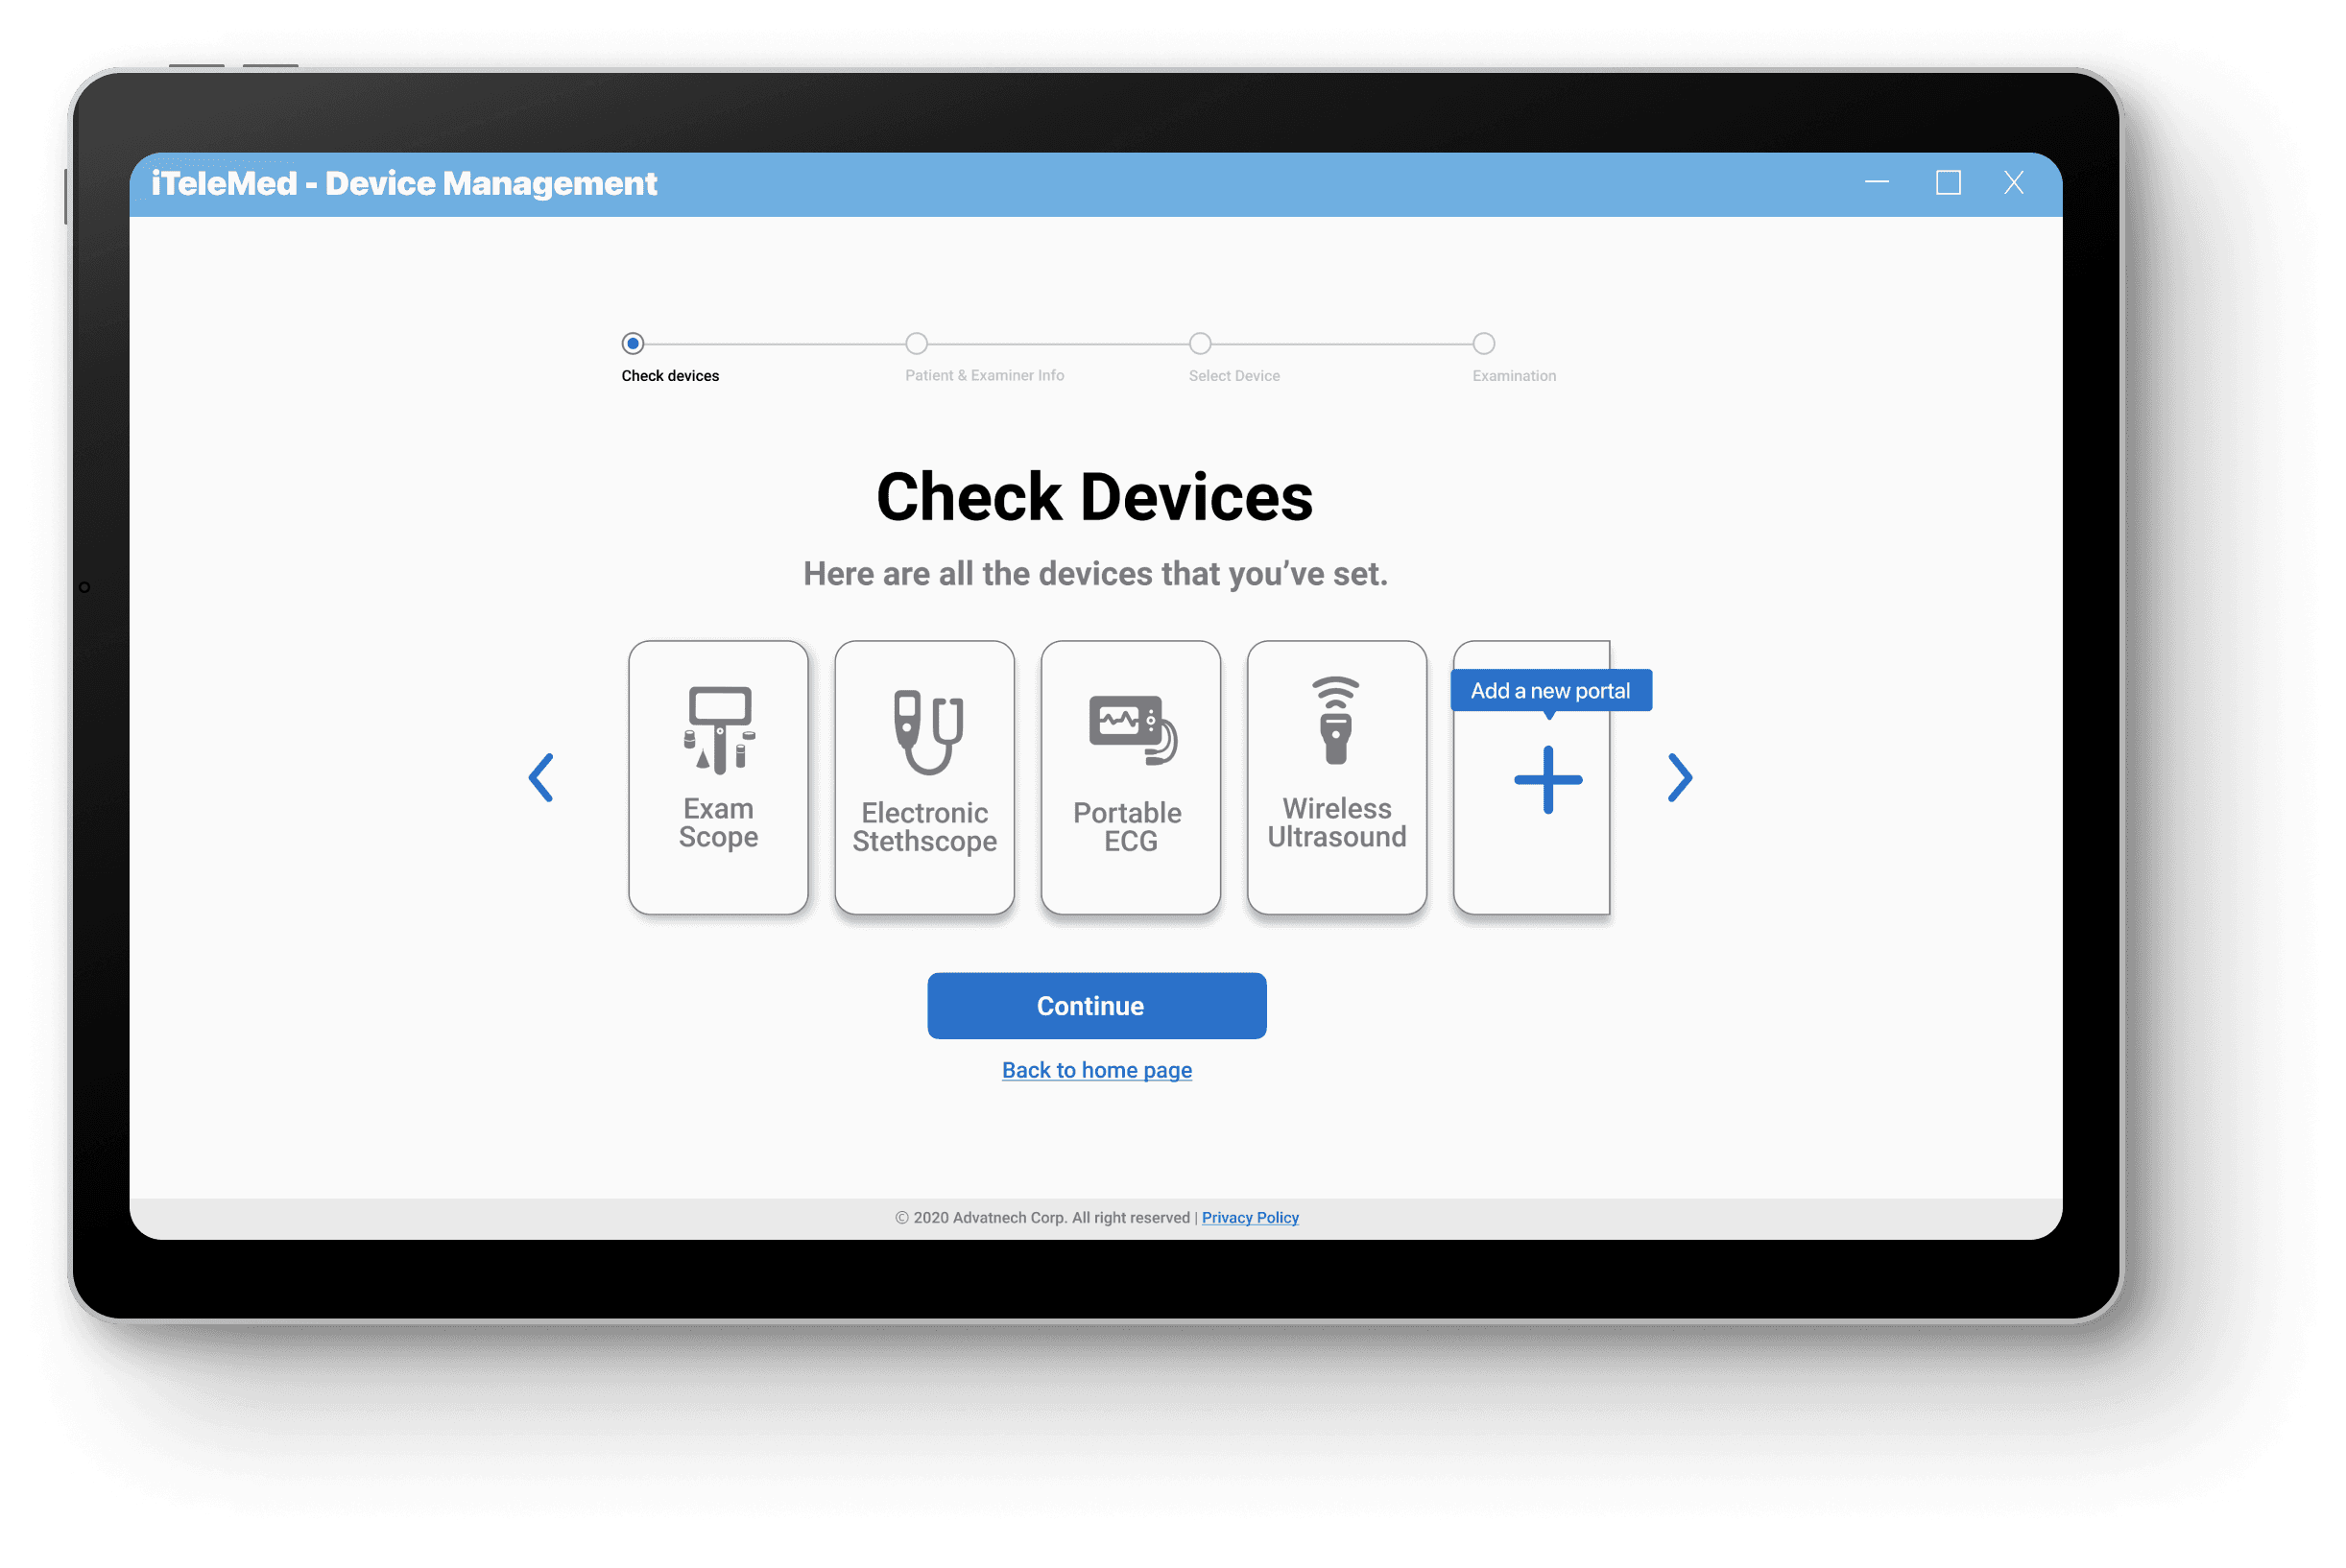
Before the examination, medical workers can verify all connected devices and add new portals if any devices are missing.
Step 04: Enter Patient Information
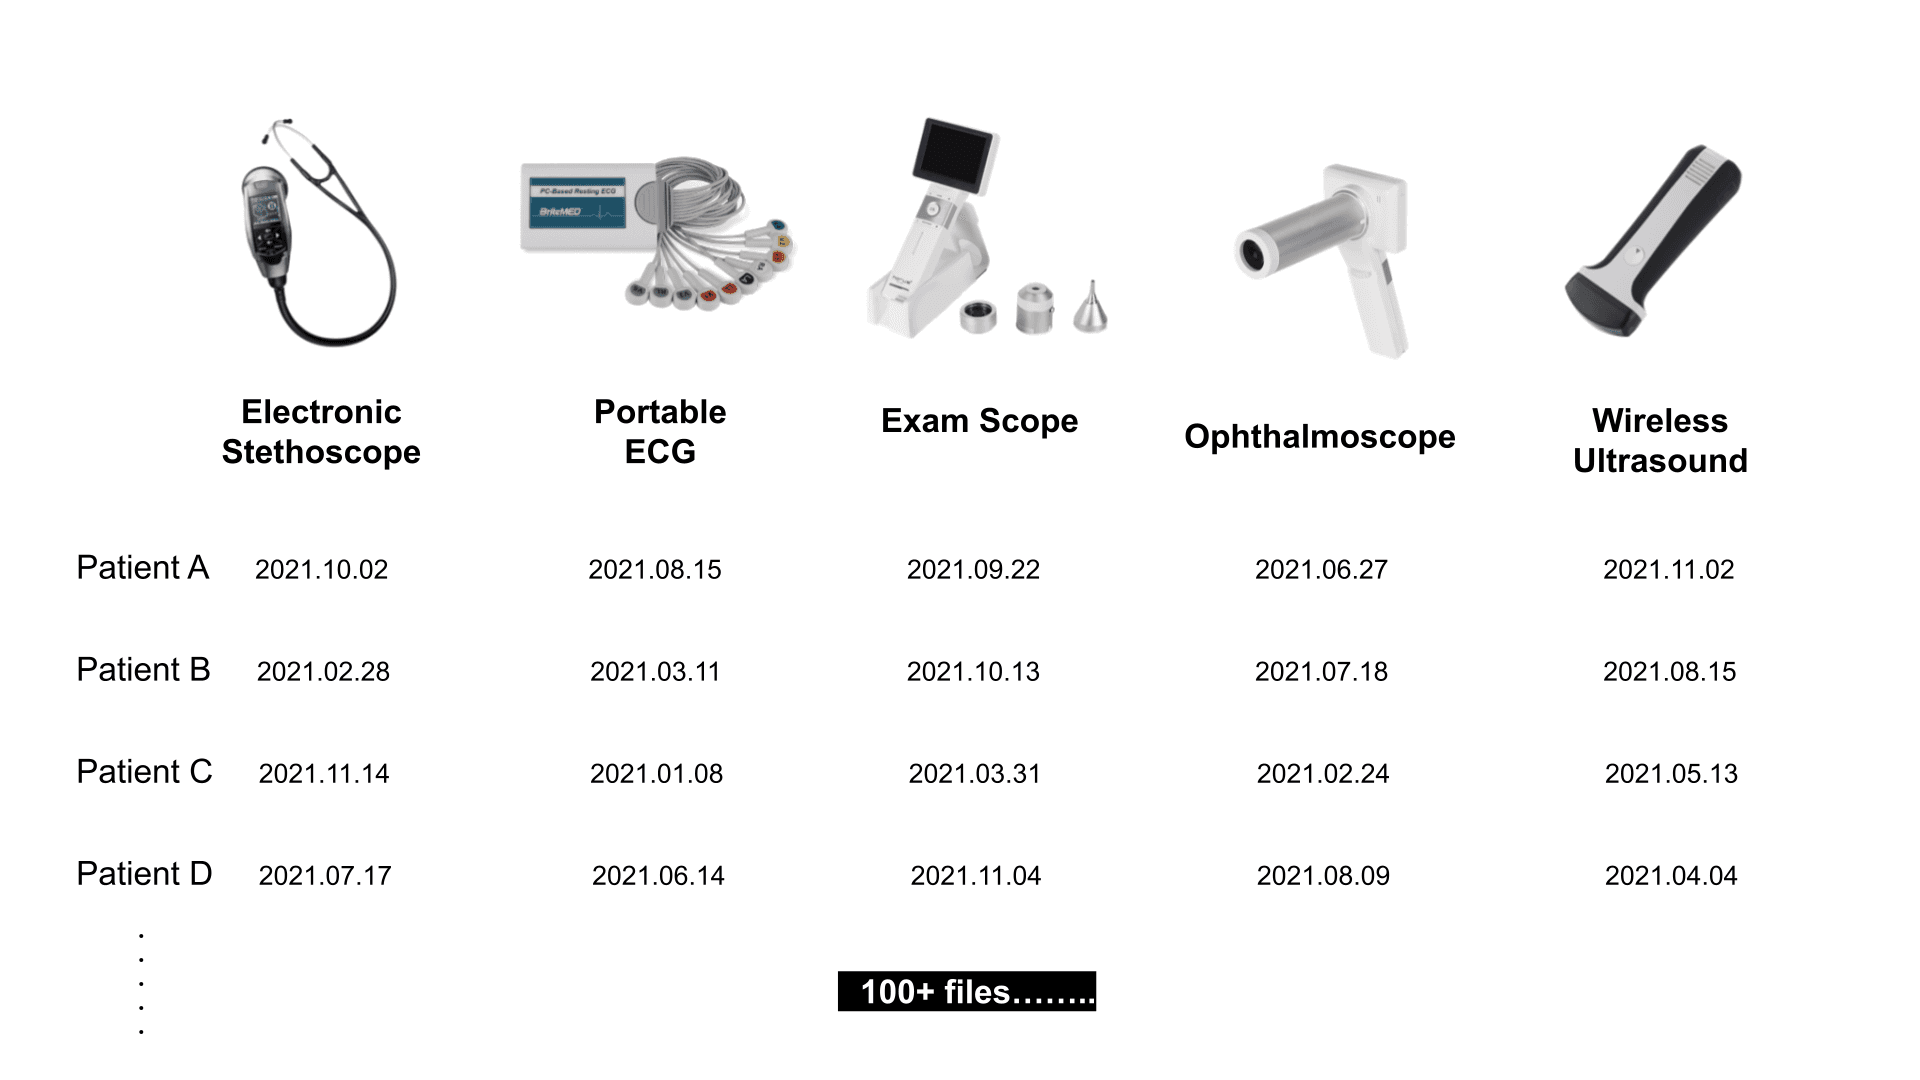
Next, staff members must enter the patient's information before the checkup to ensure that the collected data is properly filed. This information includes the patient’s name and ID numbers, allowing all collected data from a patient to be associated with the same ID. This system enables medical staff to easily locate and retrieve files using the patient's ID.
Step 05: Choose the Examination Device
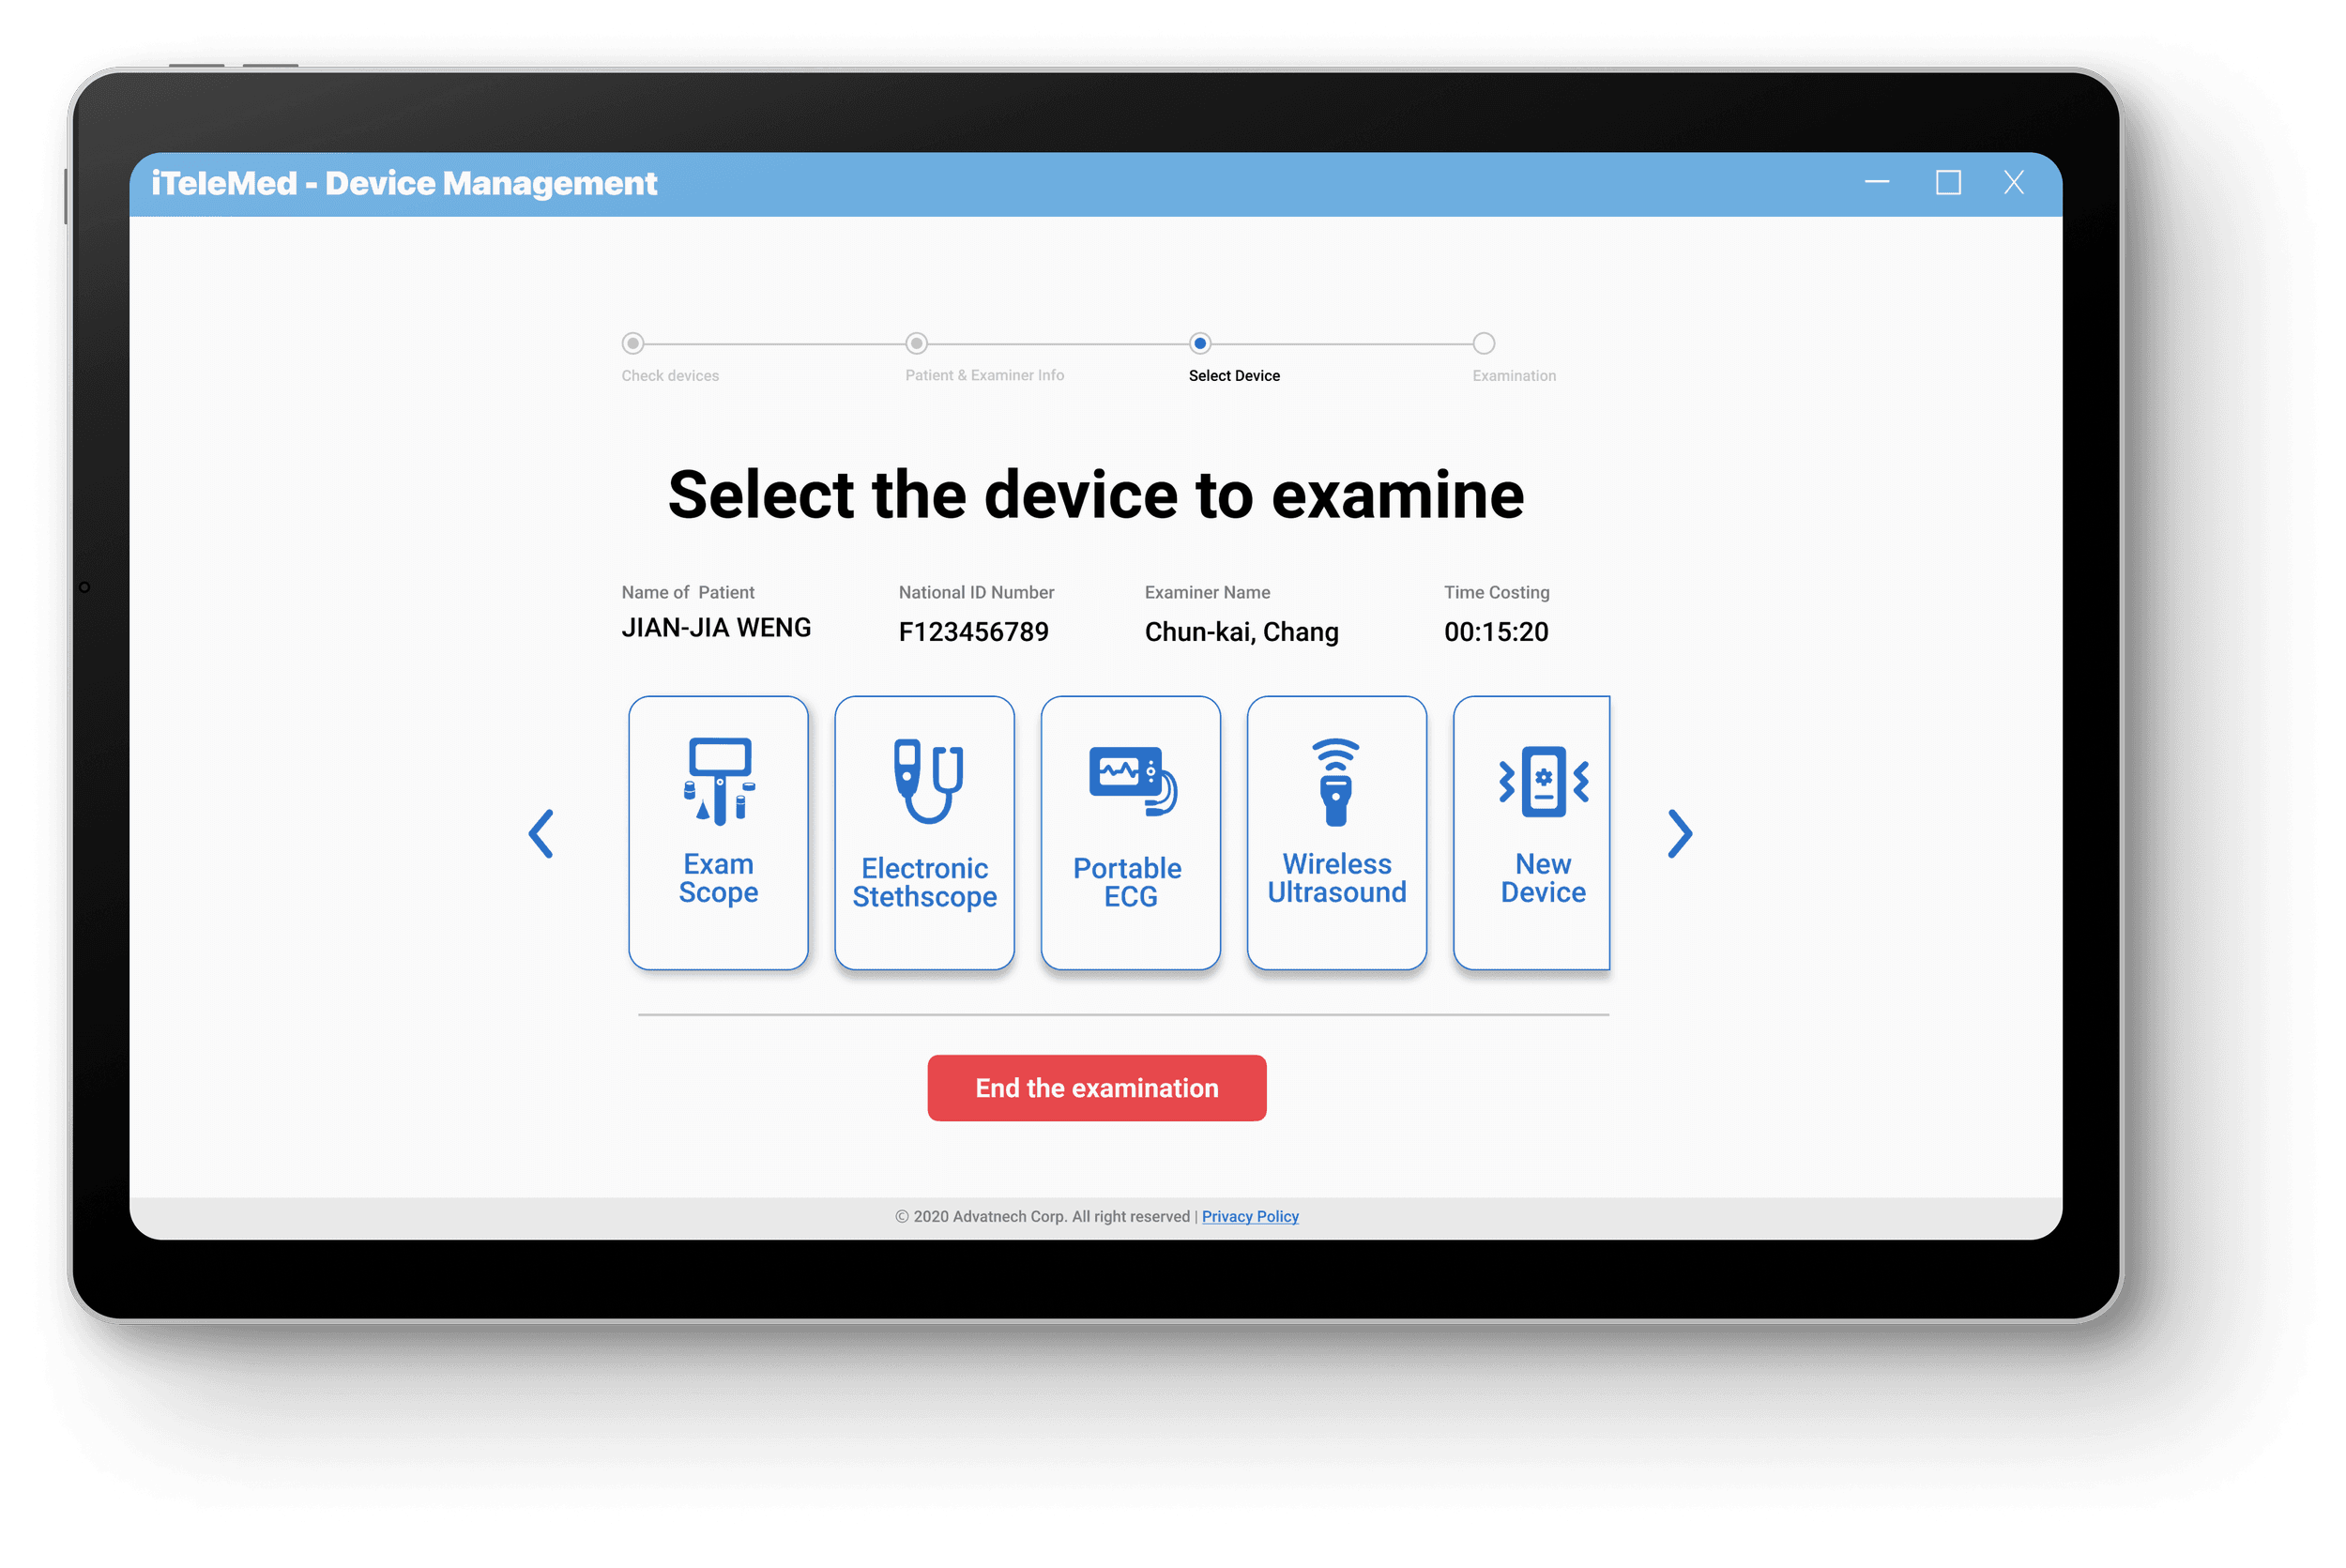
During this process, the medical staff can select the devices for conducting examinations. Once a device is chosen, the corresponding medical software, such as ECG, will automatically launch.
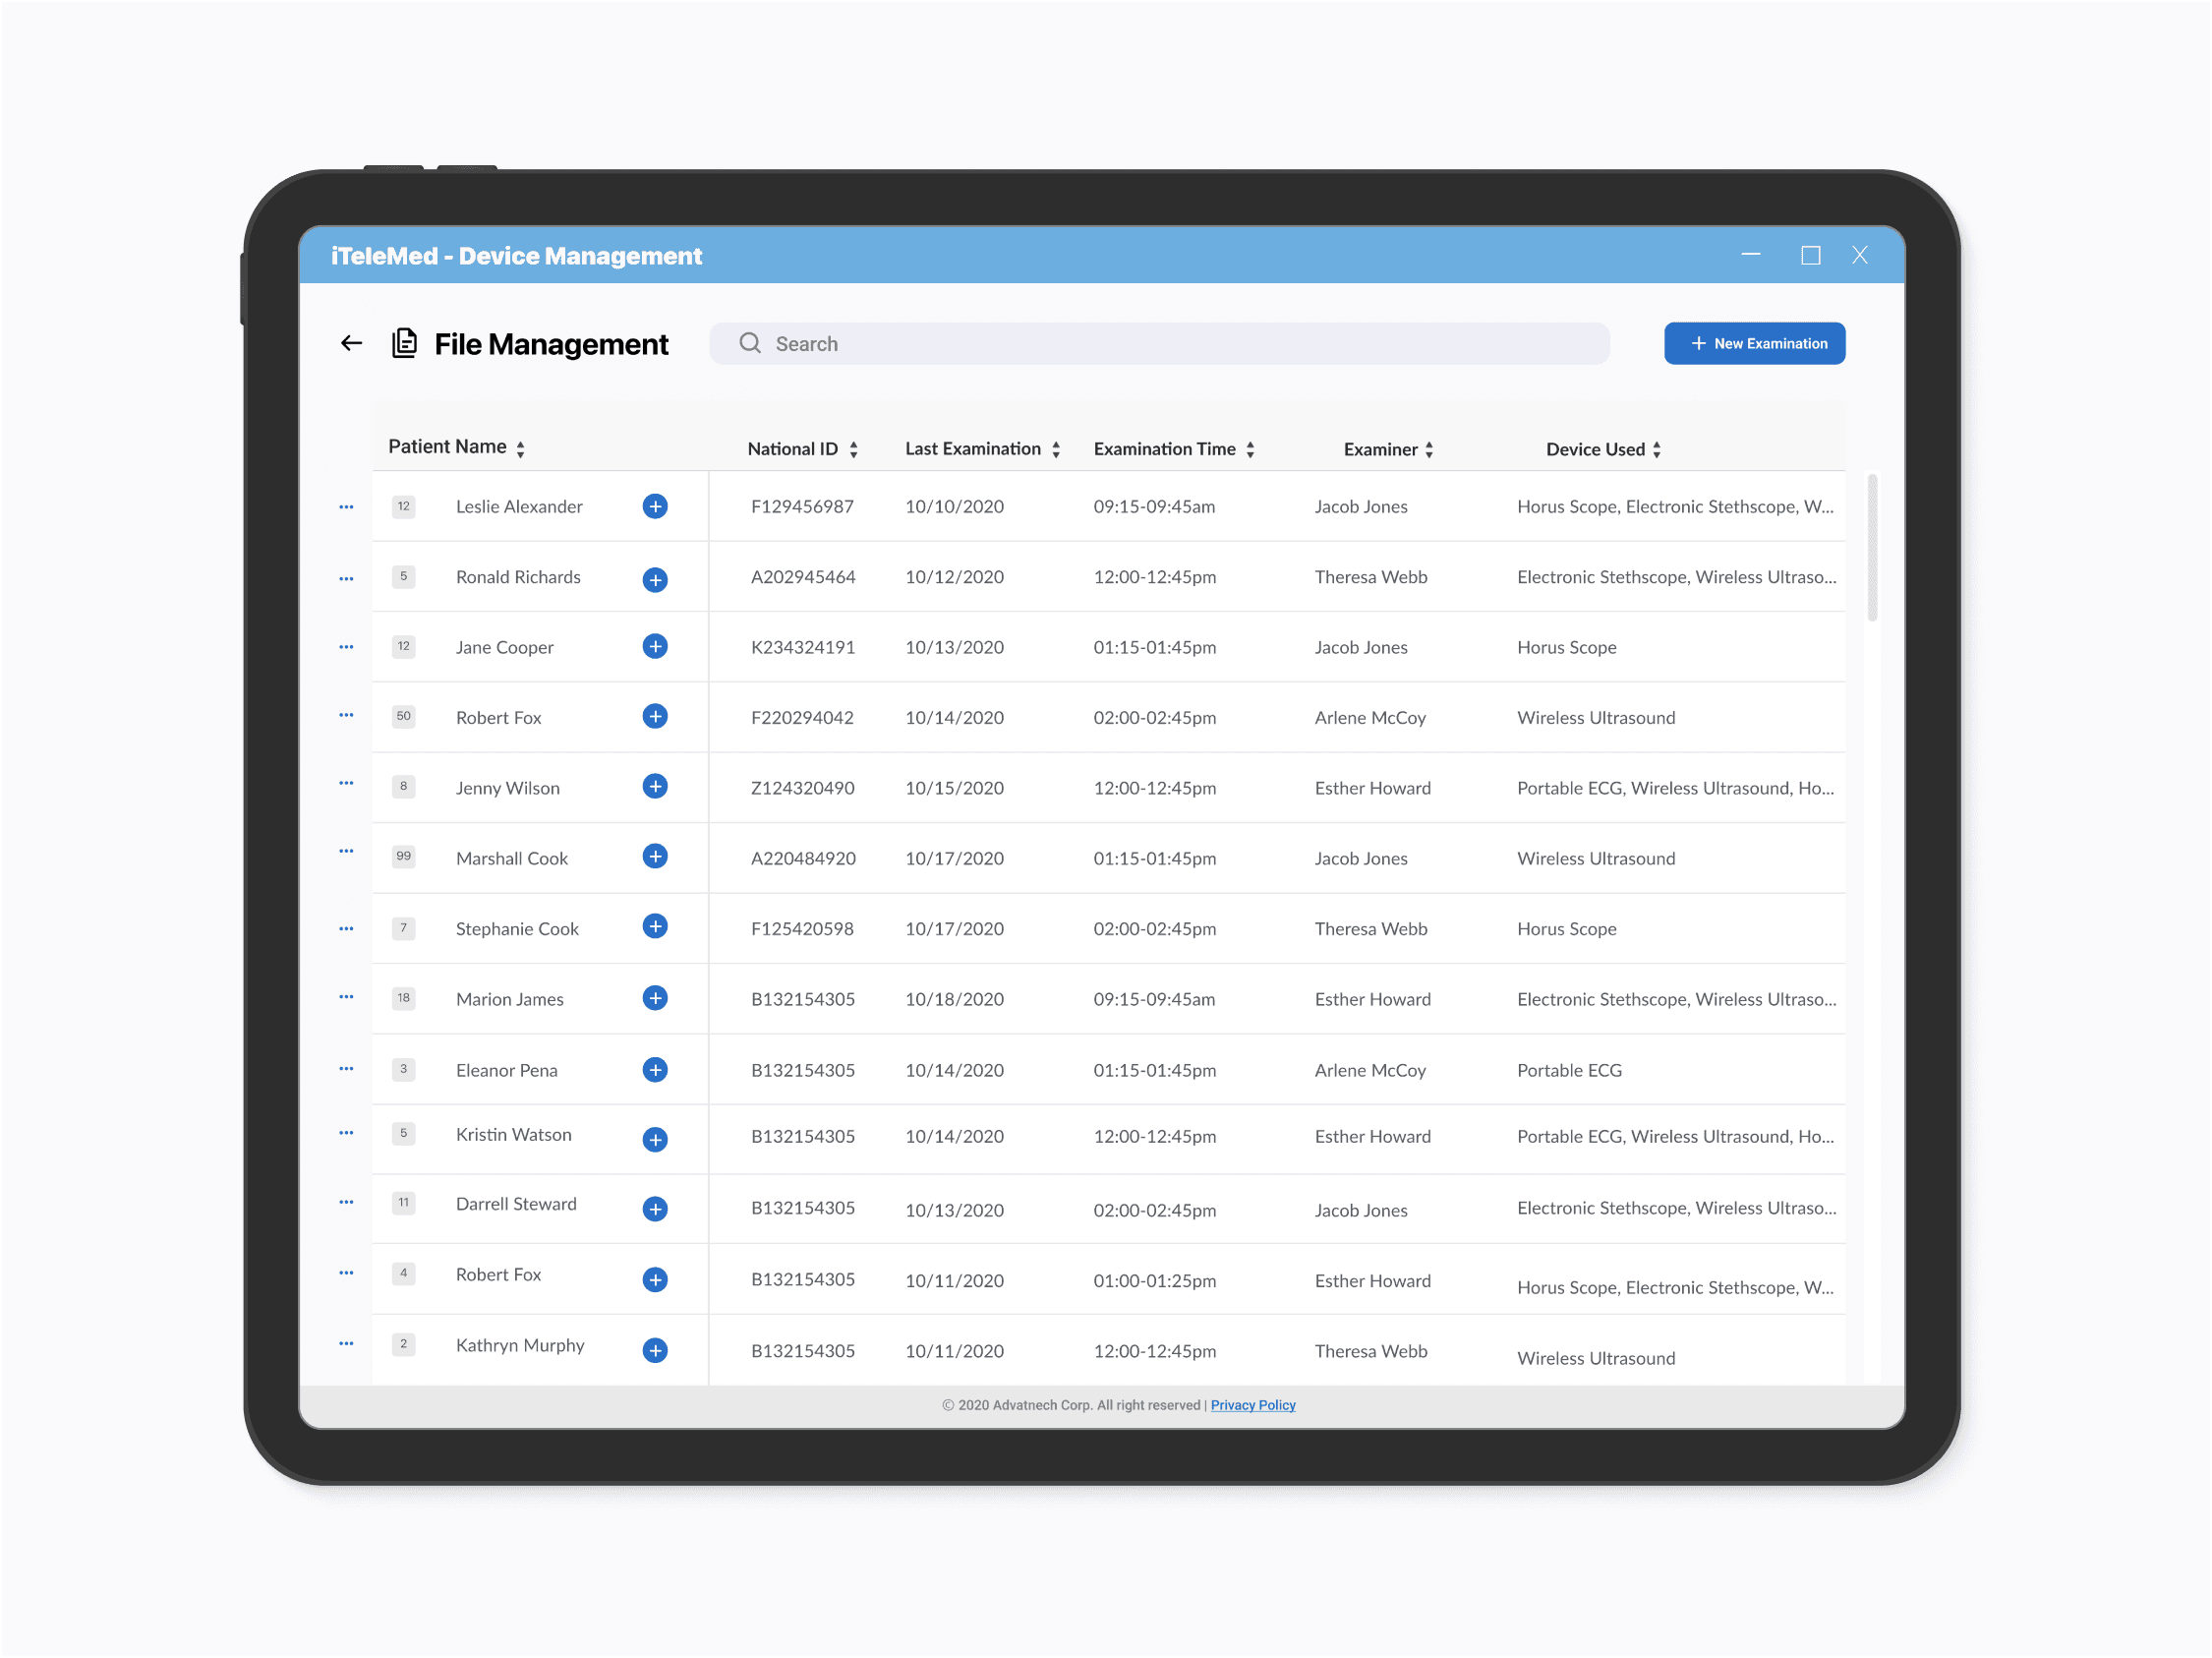
Step 06: Manage Examination Records
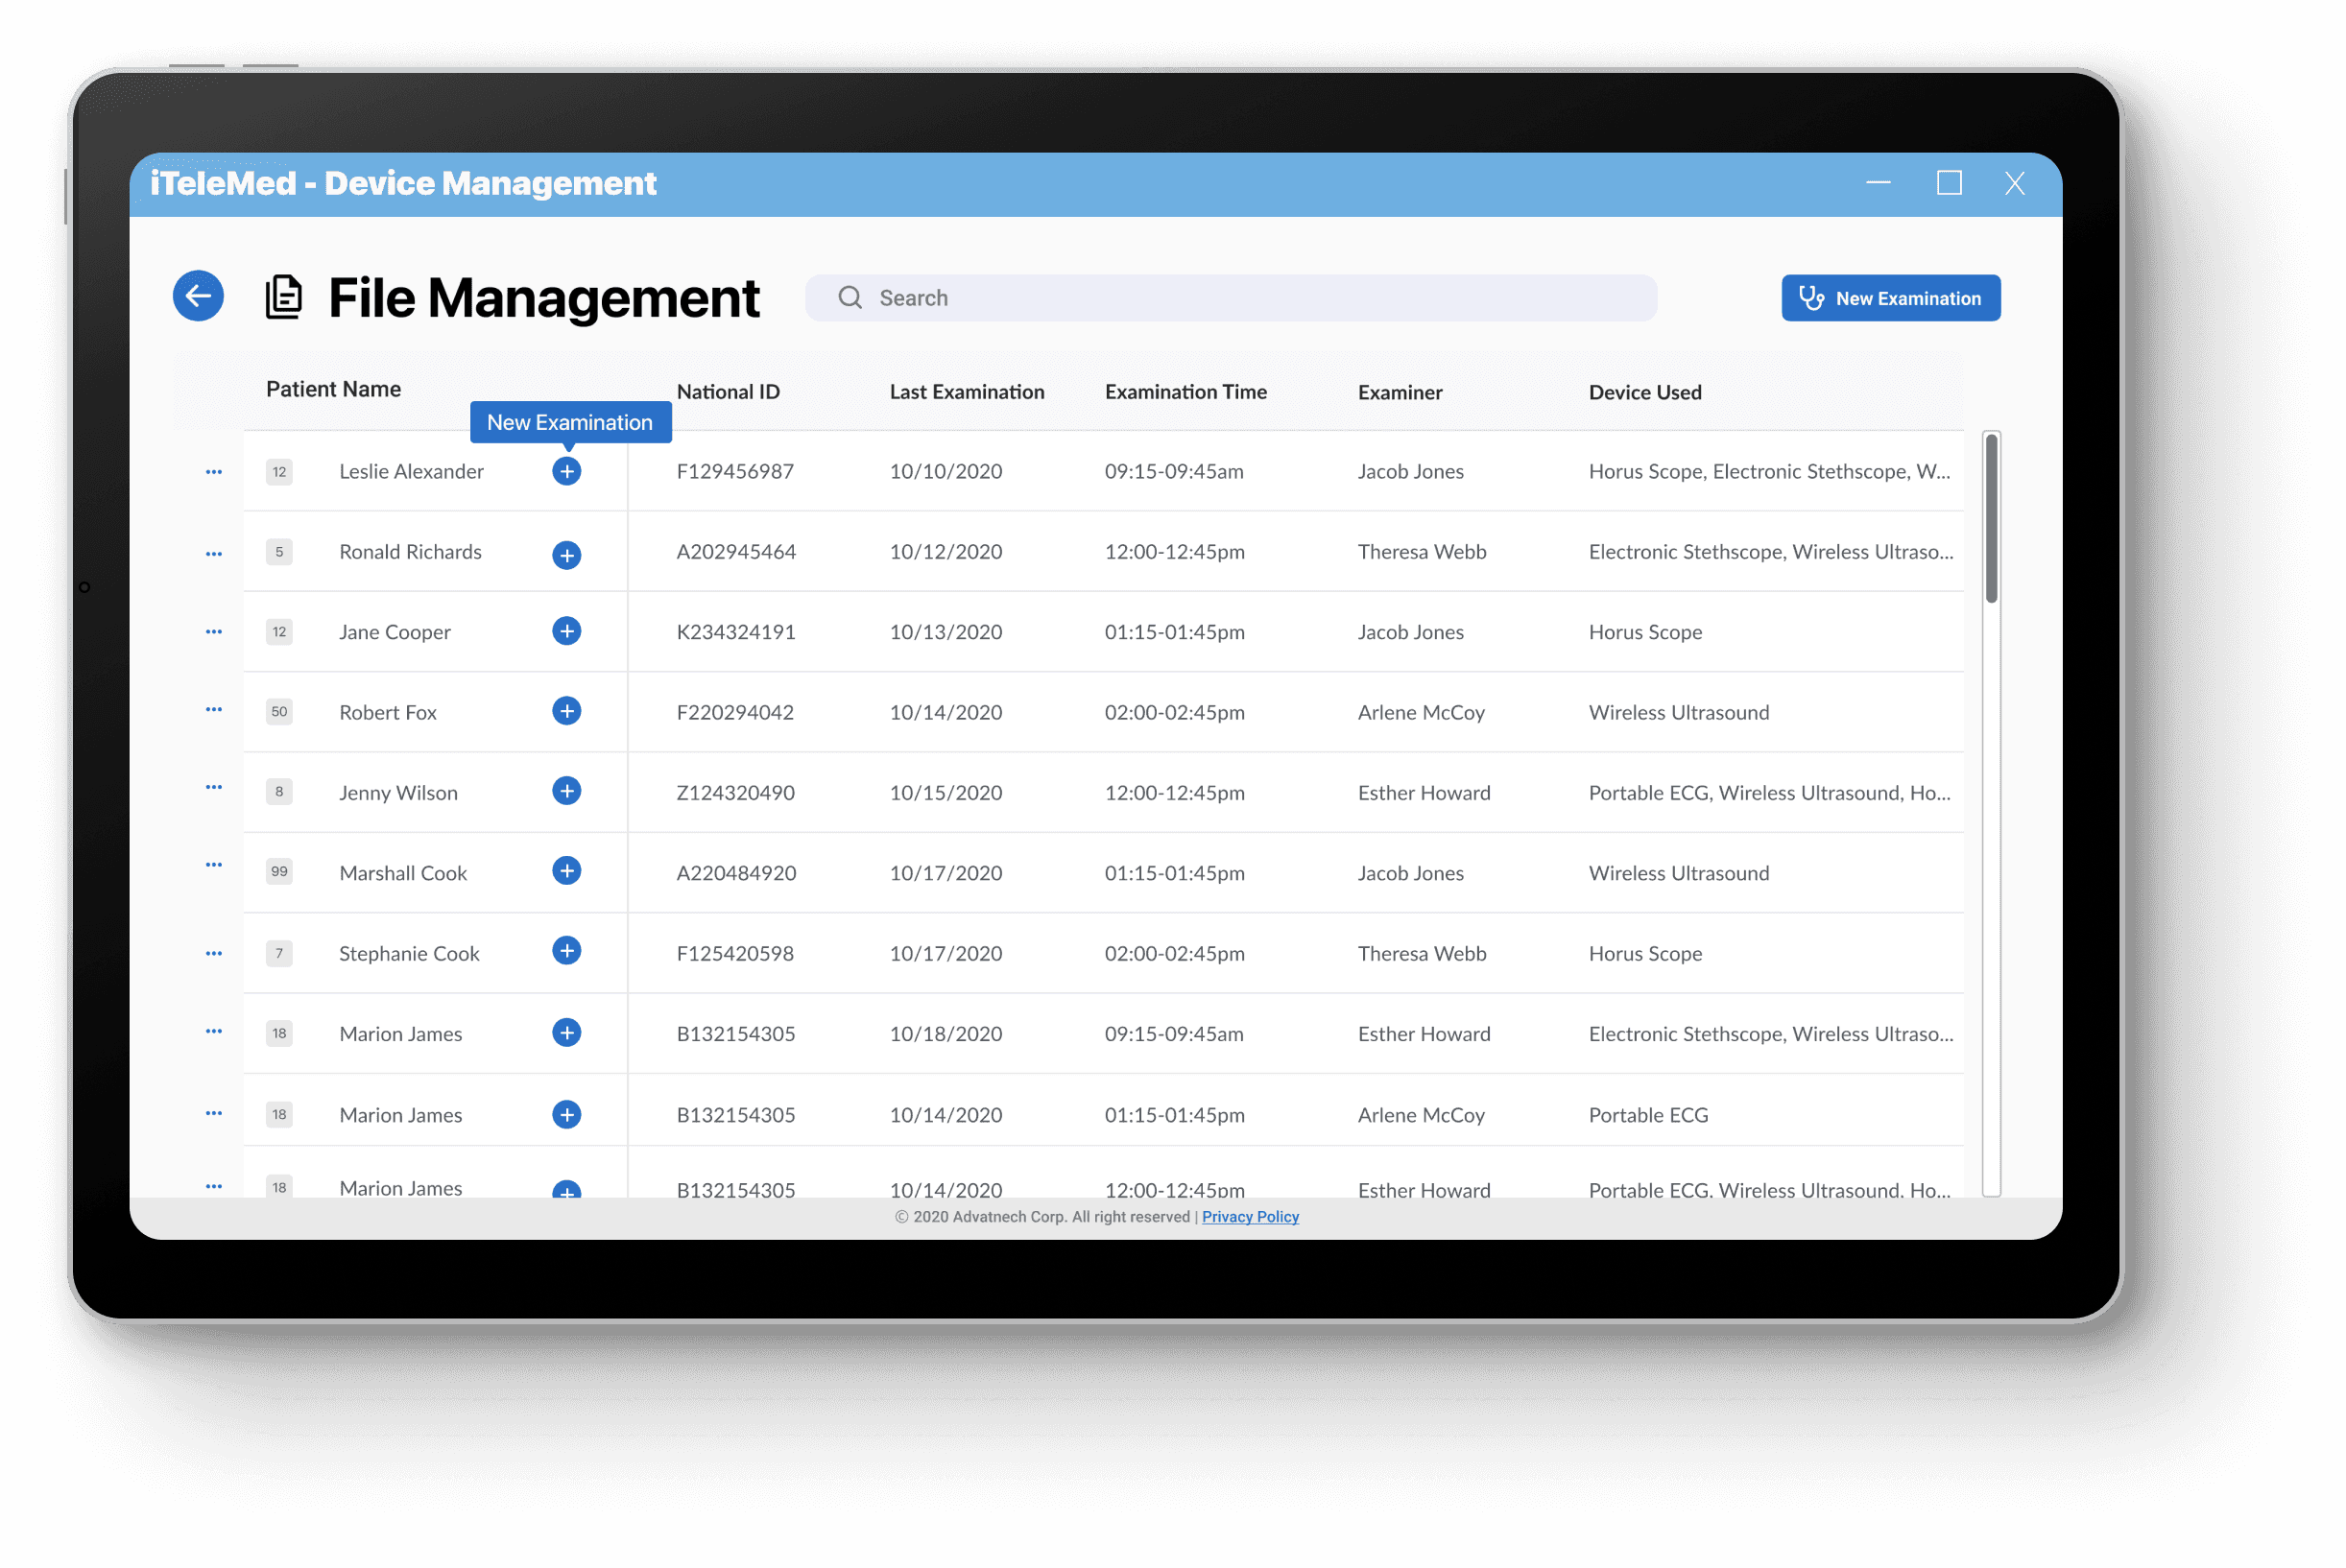
All data collected through Device Management, including PDF files, images, and audio recordings, are organized by patient ID. With an internet connection, these files are automatically uploaded to the cloud and seamlessly integrated into the hospital's internal information systems. If a subsequent checkup is needed for the same patient, staff can quickly initiate a new examination through File Management. This process ensures that all records for a particular patient are stored in the same folder, allowing medical staff to manage files more efficiently.
